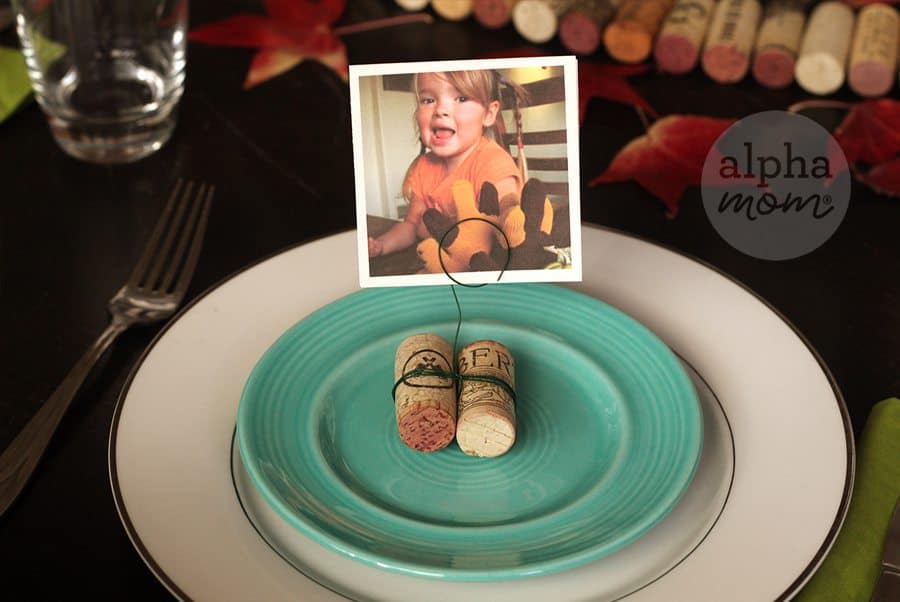
DIY Thanksgiving Family Photo Cork Centerpiece
Thanksgiving is a big deal in my family. I have so many memories of long table dinners packed with laughing relatives telling jokes and passing heaping plates of delicious food that some loved-one slaved over in the kitchen. There are so many good memories, it’s bittersweet when I can’t recreate every single one of them again and again. (Of course there are some bad memories too but I’m choosing to block those out.)
As the years go by, who sits at that table expands and contracts as family members come and go. Some loved ones move far away, some start their own family traditions somewhere else, new friends join the family, some pass on and are missed…it’s an ever-changing cornucopia of loved, happy faces.
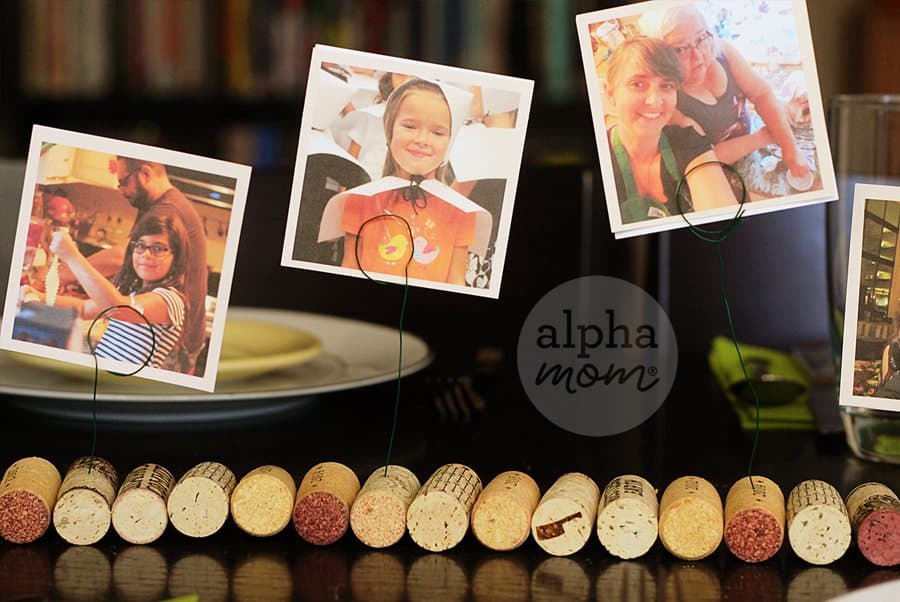
Wouldn’t it be nice to find a way to bring all those faces together again and make them into a centerpiece so we can look at them and reminisce over Thanksgiving dinner? What if we created a photo centerpiece with all those faces?
I have been saving our wine corks to upcycle for craft projects and now I have one! I save my corks because you just never know what you could make with them. There are so many cool designs using corks these days. I’m a bit sentimental and many of these corks are from celebrations that hold fond memories of milestones and just good times. I have a friend who actually writes down the date and a small note on her corks so she can remember when she enjoyed that particular bottle. If you don’t have a cork collection at home, you can buy recycled corks as crafting supplies now.
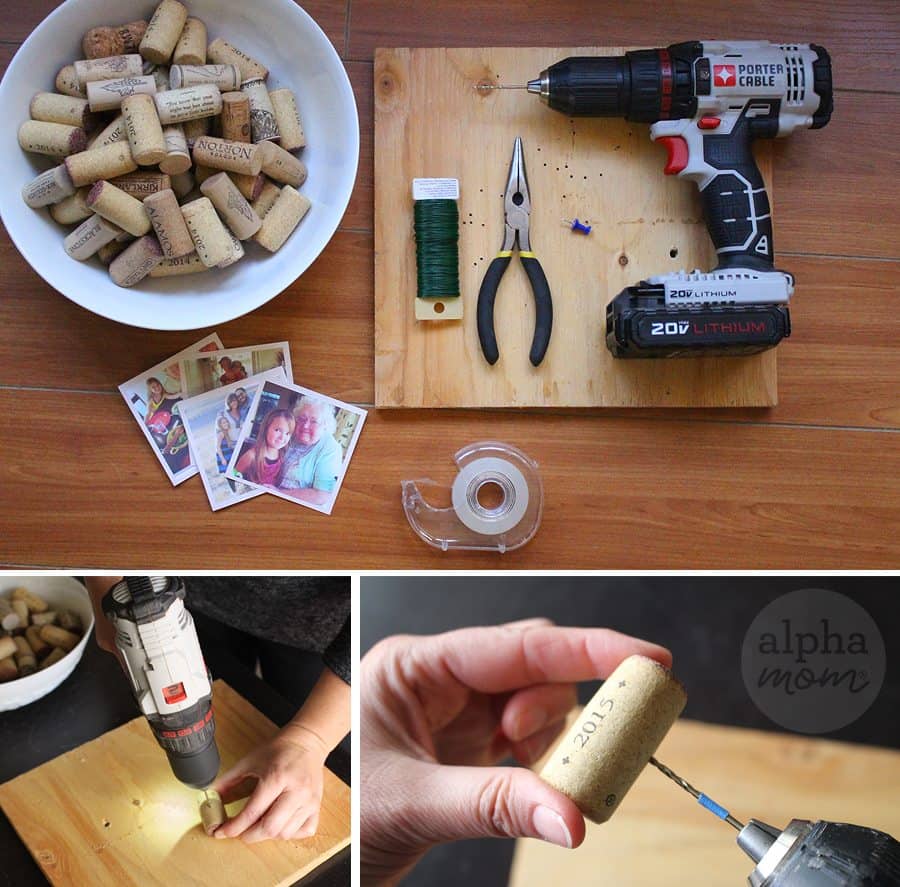
Supplies to create a Cork Family Photo Centerpiece
- corks (as many as you like! I used 29 here)
- floral wire (or any easily bendable wire). You’ll need a lot so buy a whole spool.
- wire cutters
- a drill with the thinnest drill bit you have (I used a 1/16th)
- something to drill on (I used a wooden board)
- photos (if you have Thanksgiving photos from the past even better!)
- tape (double stick and regular)
- a push pin
How to make a cork Family Photo Centerpiece
First you’ll need to drill your corks with your fine drill bit. Drill a hole in the center of each cork (drilling down on it long-ways) all the way through to the other side. It’s best to do this over a board so you don’t accidentally drill a hole into your table or work space. Also don’t drill into your hand because that would just be stupid. Obviously this part should be handled by a responsible adult who knows how to use a drill.
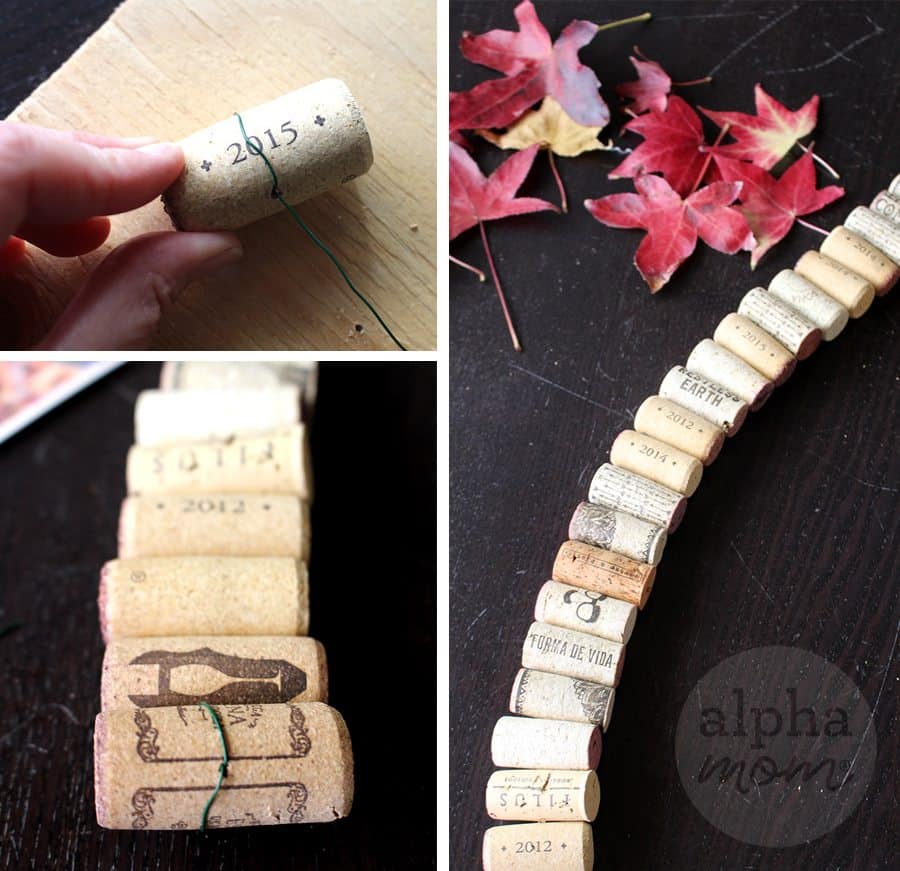
Now you are going to string your corks together, kind of like beads. Cut a long length of wire about how long you’d like your centerpiece to be and then add a few inches on each side for securing the ends. Stick the wire through your first cork and through until you have at least two or three inches sticking out. Then wrap the lose short end around the cork and stick the loose-end back into the original hole so it’s hidden and won’t accidentally poke anyone. Then string your next cork, and your next, and your next until you reach the other end. Secure this end the same way you did with the first cork by wrapping the wire around the cork and then sticking the loose-end back in the hole. Now you have the base of your centerpiece!
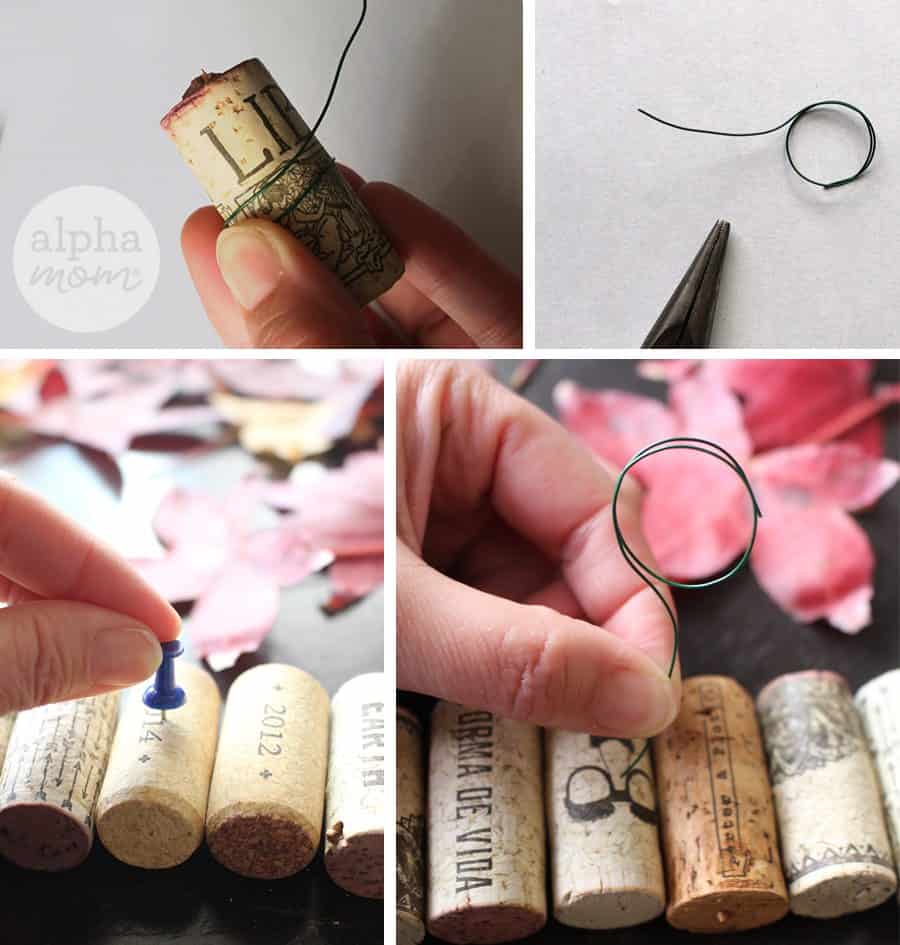
Next you will make your photo clips. This part is a bit tricky so go slow and be methodical about it. Cut a length of wire about 6-7 inches long. Take one end and wrap it around a spare cork. Wrap it three times tightly. Then remove the cork and set the wire aside. Take your push pin and pierce a spot on your centerpiece where you would like to insert your first photo. Remove the push pin and insert your wire photo clip into the hole you made with the push pin, like so! (See above photo.)
Repeat until you have inserted all the photo clips that you would like for your centerpiece. It’s a good idea to make some long and some short for more a more interesting display but if you like things all perfectly in a row by all means do that too.
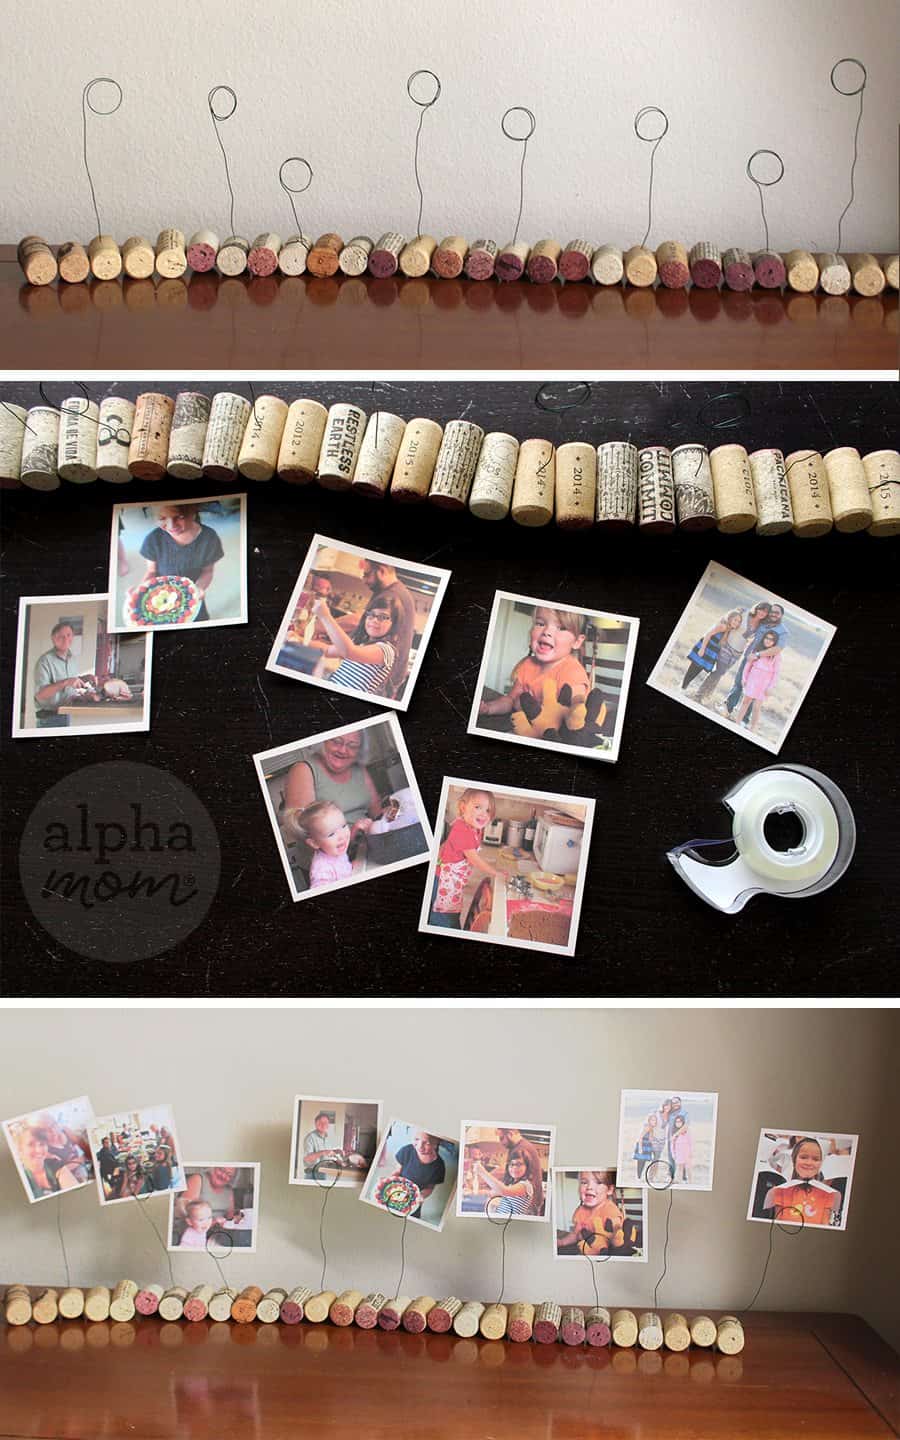
Then set your table and place your photo centerpiece down the middle. You can twist and tweak the wires whatever direction pleases you. Make sure that each person has at least one photo displayed towards them.
If you thought that was fun you could even create little mini photo place cards by wrapping two corks together and adding one individual photo clip and photo. Then place at each setting. Just think how pleased your guests will be to find a photo of themselves or some precious memory on their plate and then even let take them home as a gift!


