DIY Skull Planters for Halloween
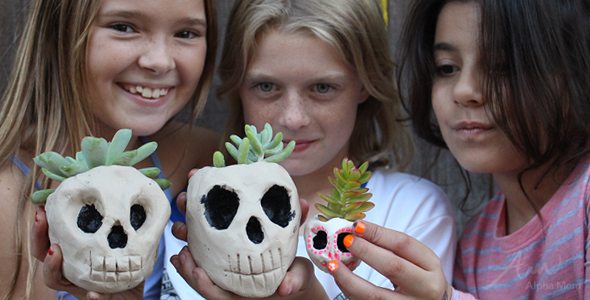
I’ve seen succulents planted in just about everything these days, mason jars, cinder blocks, toilet paper rolls…they’ll grow in anything with very minimal care. So I thought why not make some planters of my own out of air-dry clay and why not make them skulls for Halloween!?!
The best part is that the creepy Halloween skulls look like they have funny green succulent hair growing out of their tops! I’m sure your kids will get a kick out of this easy craft.
Supplies to make some easy Halloween Skull Planters
- white air dry clay (sold online or at your local craft store)
- a toothpick
- a skewer
- non-toxic kid-safe acrylic paint
- a small succulent plant (you can save this purchase until after you’ve created your planter)
- small ceramic pot (optional)
How to make easy Halloween Skull Planters
1. Find a clean dry surface to create your clay planter.
2. Roll your clay into a ball. Depending on the size of the planter you want, create the ball that size. We created big palm-sized planters and tiny ones, too, so you pick what you want your planter to end up like and create a ball that size. But make sure it’s big enough to accommodate your plant.
You can form your clay around a small pot if you have one too. Just stick the plant pot on the top of your ball and form your skull shape around it, making sure that the pot is completely covered on all sides but not the top.
3. Now you are ready to make your skull face. Gently poke two eye-holes into the clay with your thumbs.
4. Then shape a smaller nose hole in the middle. Your skull will give as you press the holes in so reshape it and smooth out any obvious creases or uneven edges.
5. Then take a toothpick and press teeth into the planter. If you are a long time reader you might remember doing this before in our Day Of The Dead salt dough bead craft. (That was such a fun craft.)
6. When you are done, create a hole in the clay planter for drainage by sticking a skewer through the bottom of the hole in your planter. This is helpful for the succulents if you want to keep them around for longer than a dinner party or seasonal decoration.
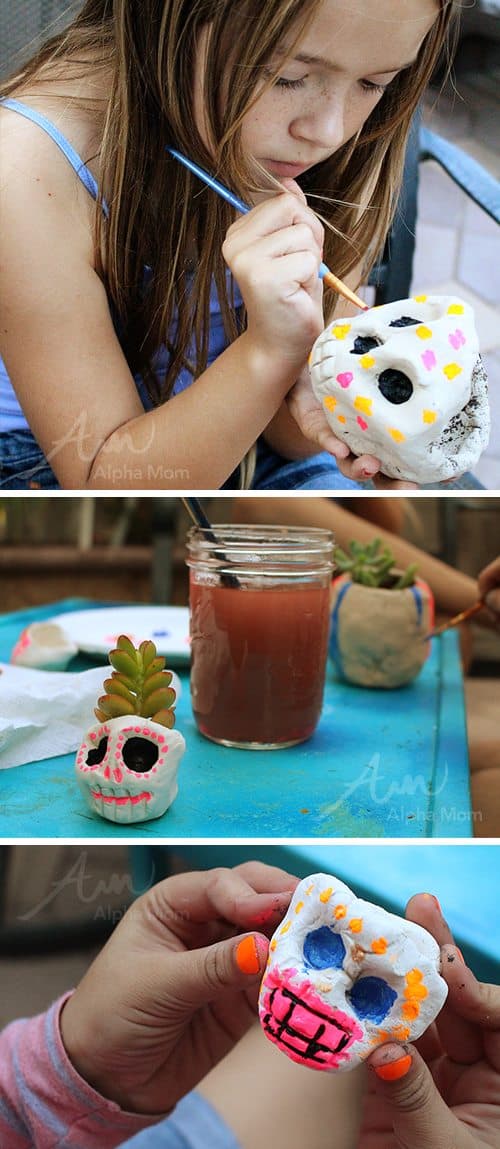
Here are some pictures of us creating the smaller planter:
It’s a pretty easy craft and great for working kids’ fine motor skills. But don’t worry about getting these planters perfect. The imperfections make them extra creepy and fun for Halloween.
Once your Halloween Planter Skulls are done, let them dry for at least a day (depending on the humidity where you live) until they are nice and hard. Air-dried clay lightens as it cures so you’ll know they are completely dry when your skulls are nice and white.
Now you are ready to paint!
You can paint in the eye, nose and teeth holes black and make them creepy for Halloween or get festive for Day of The Dead!
Either way they turn out really cute and you’re probably going to want to keep them around for the rest of the year!
A note about the gardening aspect of this craft. Succulents don’t require much water or drainage but if you do plan to water your succulents regularly and keep them around for longer than a few weeks, you’ll probably want to keep these planters outside or on a window sill where you can monitor their care regularly. The moisture will seep out the bottom and into the clay. If you’re okay with that, they could turn into some nice mossy additions to your garden or just make sure you keep them on a small dish.
Happy planting!
Discover More Halloween Crafts Here:
- Halloween Craft: Silly Pumpkins
- Angry Birds Pumpkin Carving for Halloween
- Halloween Craft: A Ghostly Garden Graveyard


