Summer Gardening: Cement Planter DIY
With the warm summer weather, we find we need more reasons to be outside and one of those reasons is greenery. Ideas for Cement DIY planters have been circulating around the internet so we decided to take a stab at our own version of them. Cement can be an intimidating medium to work with but it doesn’t have to be! It’s a lot like working with mud and just as much fun (though, adults, you do need to take safety precautions– see below).
Supplies needed to make cement planter:
- two nesting disposable containers (at least 1 inch in size difference)
- a medium-sized disposable bucket for mixing
- quick setting cement
- perlite
- a watering can full of water (or a water source near by)
- a paper cup for measuring
- small stones or rocks
- straw (optional)
- a stir stick
- gloves
- mask
- paint (optional)
First prepare your work station. Make sure you are working outside and on paper or a surface you don’t mind getting dirty. Wear a mask when mixing because the cement can get dusty and you don’t want to breath it. We found gloves really useful to for hand-mixing when the cement got thick. Get everything ready so that you can work quickly.
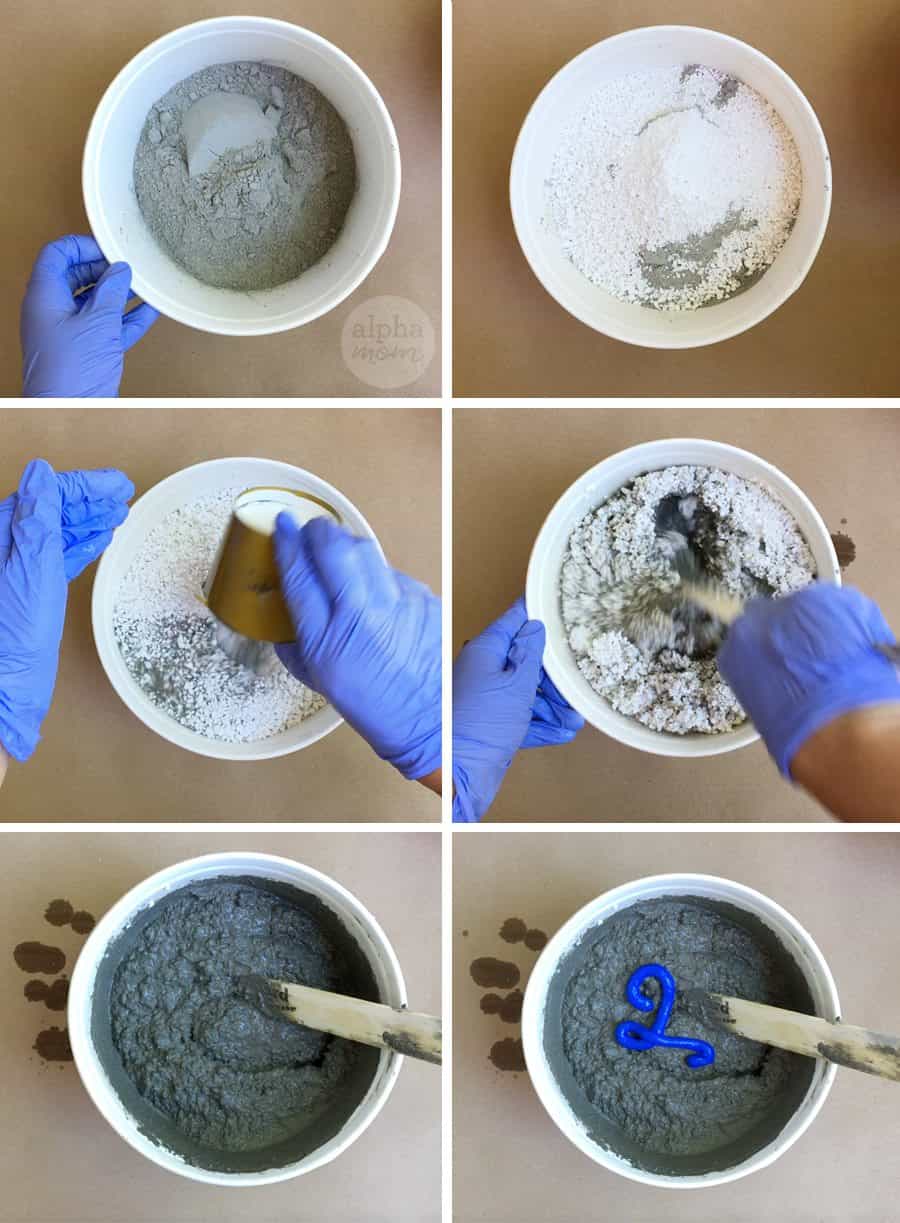
Now you are ready to mix! You can follow the directions that come with your container of quickset cement or wing it like we did. The basic ratio is 5.5 parts cement to 1 part water but you can add more water to make it more slurry. The more water you add, the longer it takes to cure. We made our cement pretty thick and it took about two days to cure completely. Of course weather will play a role also. If you live in a hot dry climate it will cure quickly and if you live in a cooler wet climate it will take longer.
First add your cement powder to the bucket. Then add the perlite. We added 2 parts perlite to our 5.5 parts cement but it is really up to you. The perlite adds texture and makes the cement lighter so add more or less depending on what you want your container texture to look like. More perlite will make the texture rougher. Less will make it smoother.
Now the tricky part: add your water! Once you add the water everything starts to activate so you have to work quickly (because as you know, cement hardens!). Mix thoroughly. Make sure you get all the way to the bottom! We found that as things got thick it was easier to mix by hand with gloves. You can always add more water if you find it’s too thick but you need to do this as soon into the mixing process as possible.
Once the cement is thoroughly mixed add a few squirts (or ten) of paint. We didn’t mix our paint in that much because we wanted it to show up as bits and pieces in the final product but if you want a more overall color tint, mix it more thoroughly or better yet make two batches and use two colors!
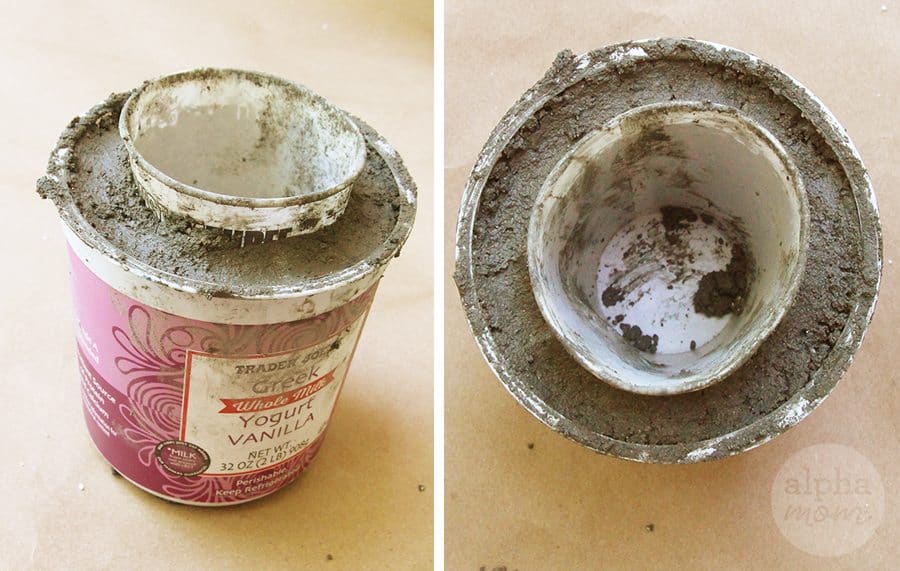
Now you are ready to put your mixture into the mold. We used a yogurt container for our outer mold and a paper cup for the inner. First start with the larger container and put down an inch of cement for the bottom.
If you are making your container for a planter, you will want to create a hole for drainage. You can do this by drilling it after it has cured with a masonry drill bit OR at this stage by sticking a piece of straw through the cement bottom and cutting it short. We opted for the drilling afterwards because we forgot about that step! Either way it’s pretty easy.
After you have laid down an inch layer of cement in the bottom put the paper cup on top and then fit cement around the sides until you reach the top. Smooth off the top and let it sit.
Once the cement has cured (a day or two) remove the containers. It’s helpful that these containers are disposable because you can cut them off. You could use glass or metal too but you’ll need to spray them with cooking spray to insure they are removable and we haven’t actually tried that yet so we’re not recommending it but I’m sure it’s possible.
The cement will continue to dry out after you have removed the mold and if you are worried about the cement leeching out and hurting the ph-balance of your plants you could leave them out in the weather for a few more days to make sure they are completely cured.
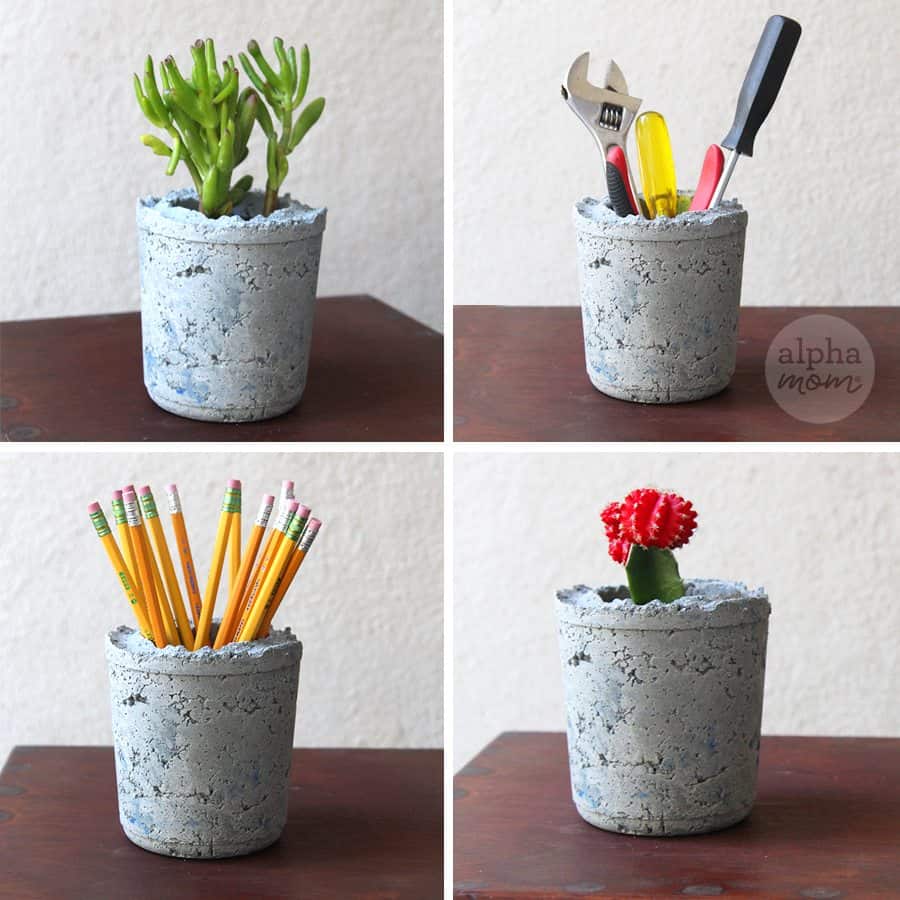
There you have it, a cement container! You can use it for plants, pencils or even tools! They also make great gifts!
Cement craft achievement unlocked!


