DIY Pharaoh’s Mummy Costume for Halloween
Looking for an inexpensive and cheerful Halloween costume idea this year? One that the kids can help make themselves? One that you probably have all the stuff for already? Well, here it is. We’ve got a set of printables that can be cut, colored and stuck together to jazz up the traditional toilet paper mummy costume.The only other thing you’ll need is a long sleeved t-shirt to stick on your head! Classy!
Let’s get started:
To make a single mask and collar there are four printable pages. You will need to print one of each of the two mask pages, and two of each of the collar pages (the collar uses four pages in all). We printed ours on white card stock, but you could just as well print them on paper and glue it onto cereal box cardboard for stability and the 3D effect.
Here are the print outs if you are printing on letter-sized paper:
Pharaoh’s Mask Part 1, Pharaoh’s Mask Part 2, Pharaoh’s Mask Part 3, Pharaoh’s Mask Part 4
Here are the print outs for if you are printing on A4 sized paper:
Pharaoh’s Mask Part 1, Pharaoh’s Mask Part 2, Pharaoh’s Mask Part 3, Pharaoh’s Mask Part 4
You will need, the printables (found above), a pair of scissors, glue, something to color the print outs with (we used crayons, but I’d recommend using coloring pencils, because the crayon wax made sticking our pieces together a bit more difficult), a bit of elastic for the mask back, some string for tying the back of the collar closed, some toilet paper and sticky tape, and a long sleeved t-shirt to make the headdress (don’t worry, this doesn’t get damaged in any way. Also, bonus points if you can find one with stripy arms!)
Have lots of fun coloring and cutting your mask pieces. Realistic Pharaoh or multicolored disco pharaoh, whatever your style is.
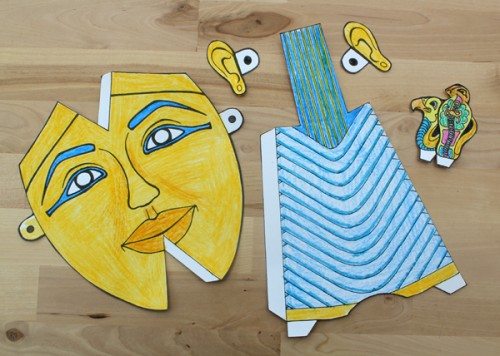
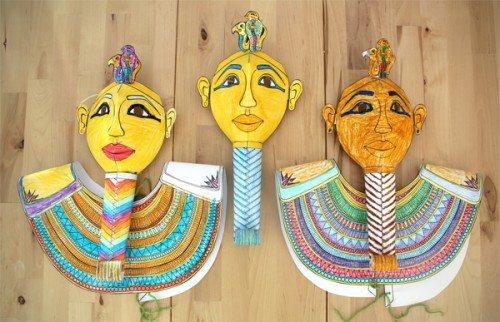
Here are all your pieces cut and colored to make one Pharaoh’s mask:
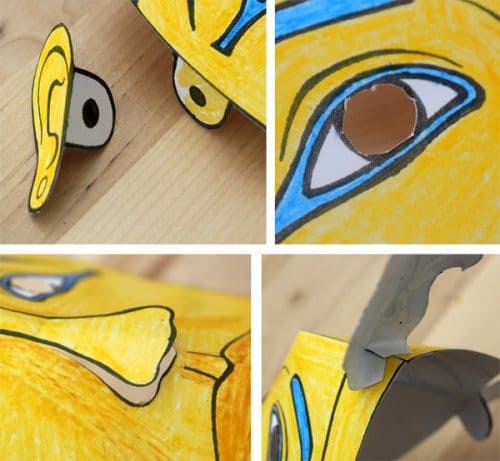
You will need to bend over the tabs on the side of the head and the ears and glue them together. This makes a little reinforced tab that you can use to attach the elastic without it being seen from the front.
You will also need to cut the eye holes out and fold the mask down the middle to cut the nose part. Then you will need to glue the two tabs that fold the mask into it’s three-dimensional shape. The little tabs on the cobra and vulture headdress decoration allow it to be glued to the top of the mask so that it stands up straight.
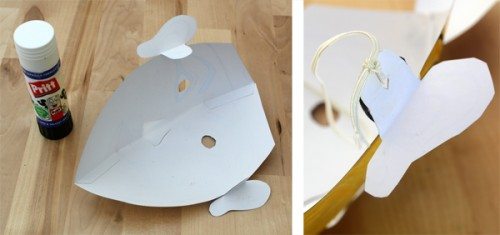
Here you can see the mask glued together from the back with the little tabs for the elastic to attach to. If you have a hole punch that would be very useful, but we didn’t, so I just folded the tabs in half and snipped a little triangle to make a small diamond shaped hole to thread the elastic through.
Next you will need to fold up and glue your mask’s fake beard and roll up and glue the bottom part to make the curly end bit. The two tabs on the front can be folded inwards and used to glue it to the front of the mask so that it pokes out from the chin.
Now that you have a completed mask, you could stop right there, but if your kid(s) really really like coloring-in then the decorative collar will keep them busy for a while!
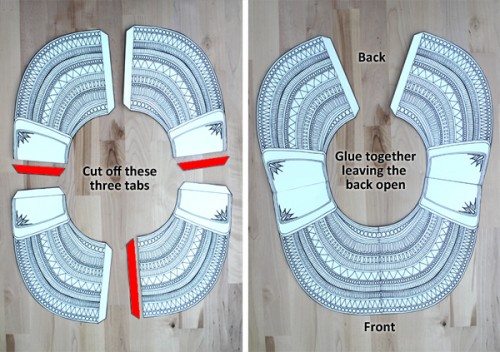
Print out your four pieces (two copies of each side of the collar) and cut them out. You can see below how they all fit together and that to do this you will need to trim off three of the tabs (shown in red).
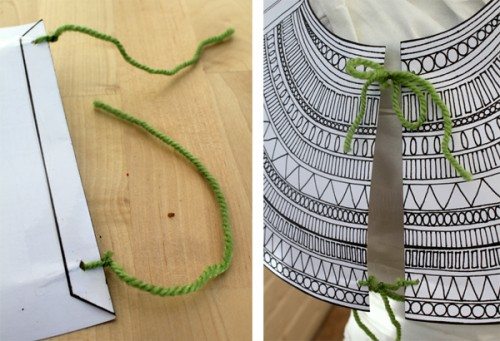
Keep the tabs on the open back of the collar so that you can fold them over and glue them to reinforce where the ties will go.
Now you are ready to get wrapped up in toilet paper!
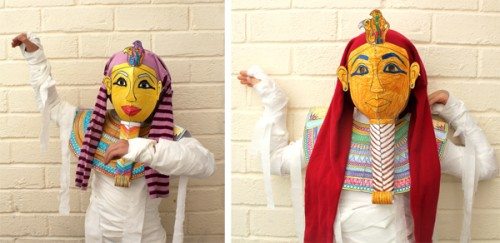
Once you are tightly bound in toilet paper, pop on your new costume collar and stick a long sleeved t-shirt on your head with the arms hanging down in front of your shoulders so that it looks like a Pharaoh’s headdress.
Then pop your mask on and go dance to that famous Bangles song. (Wink.)
Now you can go be proud, not only of your handiwork, but also because your entire Halloween costume is completely recyclable! Bonus! Just remember to flip your mask up so you can see really well and safely to cross the road/street when you go trick-or-treating!


