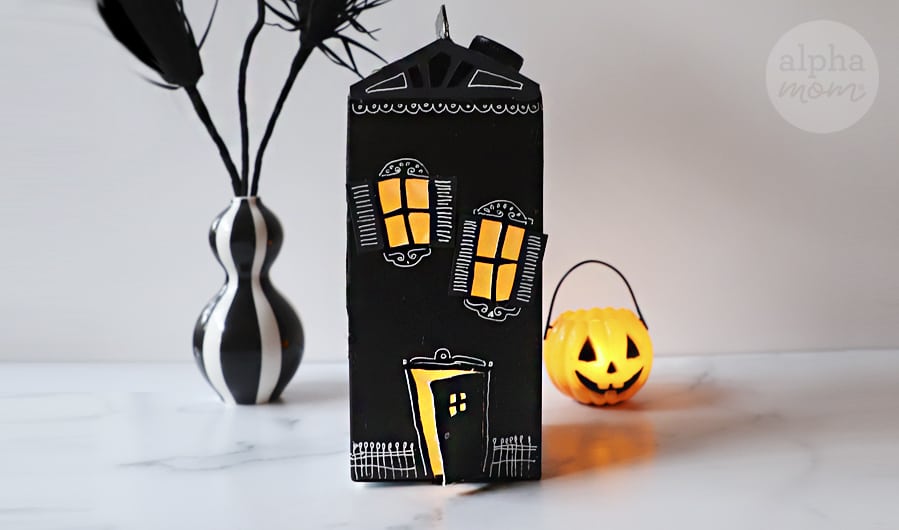
Milk Carton Haunted House (Halloween Craft)
I have loved my little milk carton Christmas village craft so much (True story: I reuse it every year during the Holidays) that I decided to make a Halloween version of it. We’re spending a lot more time stuck inside these days, because of COVID, and we might as well start decorating the mantle early is what I say!
 by Brenda Ponnay for @alphamom")
Supplies you will need to make Milk Carton Haunted House Craft
- a clean, empty milk carton (or creamer or any carton that is square and boxy)
- black paint (I used acrylic in a ventilated area)
- black card stock or construction paper and glue (optional)
- paint brush
- x-acto knife or blade (to be used by a responsible adult)
- orange tissue paper
- a batter-operated tea light
- a white gel pen (I love these ones)
 by Brenda Ponnay for @alphamom")
How to make Milk Carton Haunted House Craft
Step 1: First, make sure your milk carton is clean and washed and completely dry. This might require a few hours sitting out in the sun just to make double sure. Don’t be like me and attempt to work with a carton that still has water inside it. It will wreak havoc on your project, believe me.
Step 2: Then paint your milk carton black. If your carton has a waxed surface you might want to sand it down just a tad before applying paint to make sure it doesn’t peel off when you are handling it. Or, you can be like me and do lots of touch up painting later, which is also pretty easy.
 by Brenda Ponnay for @alphamom")
Step 3: This next step is optional but I think it adds some flair. I cut a triangle piece of black card stock, cut some decorative bric-a-brac holes in it and glued it to the gable of the milk carton roof with a bit of hot glue. I think it gave it a bit of a Victorian feel but obviously you could improve on this if you have some mad x-acto knife cutting skills.
 by Brenda Ponnay for @alphamom")
Step 4: Next, I cut the windows for this Milk Carton Haunted House. This is the key part of this craft and the fun part because… you know what makes a haunted house seem more haunted? Crooked off-kilter windows.
Cutting neat straight boxes is not important! This makes my non-perfectionist heart sing. So go crazy and you don’t even have to stress if things are wonky and ajar. They look better for it! I found that making them narrower at the bottom and wider at the top give them an appearance that they are towering over you, which is always a good haunted house effect.
Cut at least two windows on all sides except the back. Cut a tiny door in the front of the carton and then cut a large flap in the back that you can use to fit your hand inside for later. You’ll need that trap door so you can put your tissue window paper in and to later put in the tea light.
You can also cut some long skinny rectangles out of your black card stock and glue them to the sides of the windows to look like shutters. Haunted houses always have shutters and usually one of them is falling off. I forgot to glue one falling off but you should.
 by Brenda Ponnay for @alphamom")
Step 5: Now for the fun part: detail with a white gel pen! There is nothing like rolling white ink on a black surface. It flows so nicely and creates really dramatic effects.
I drew lines on the shutters, some curlicue decoration above and below the windows, a door knob (of course), and an iron fence around the bottom (New Orleans style). I also drew some scallops on the roof to look like shingles. You could draw in some spider webs or even a ghost floating out a window but I kept it simple.
 by Brenda Ponnay for @alphamom")
Step 6: Next, I taped some small tissue paper squares over the windows from the inside through the handy trap door I created in the back. Then I popped in a flickering tea light and ta-da! Instant tiny haunted mansion for your fireplace mantle! Or, fill it with wrapped candy and give it to your best neighbor!
 by Brenda Ponnay for @alphamom")
If you are like me, celebrating Halloween can last the whole month of October and a good upcycled craft warms my heart more than a pumpkin spiced latte!
Happy Halloween Month!
More Halloween Decorations at Alpha Mom:
1. Creepy Eyeball Pinecone Wreath for Halloween DIY
2. DIY Skull Planters for Halloween
3. Spiderweb DIY Candleholders