Creepy Eyeball Pinecone Wreath for Halloween DIY
Time to pull out all the spooky decorations and get ready for Halloween!
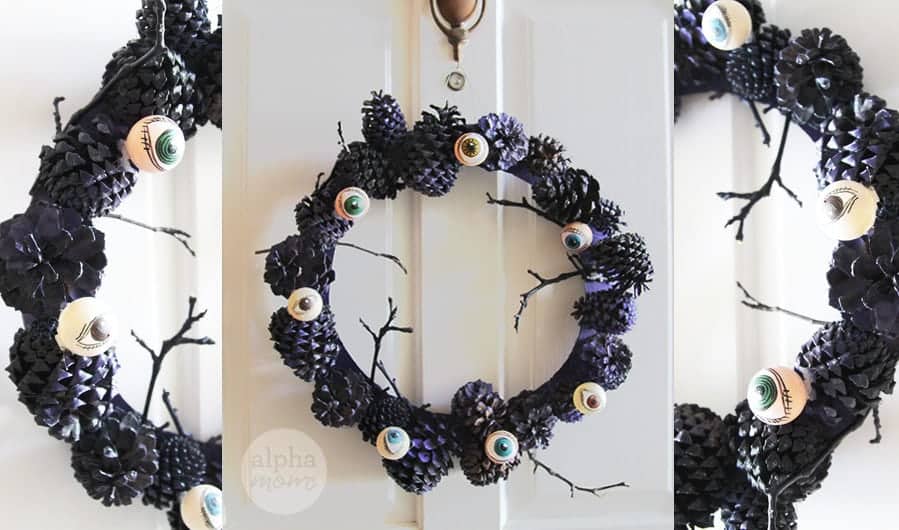
Last year, I made this really cool creepy wreath with pine cones, ping pong balls, sticks and cardboard. It turned out so great I made a point of bagging it up and saving in a safe place in the garage so I could bring it out again this year. It’s definitely a favorite in our holiday decoration collection.
 by Brenda Ponnay for Alphamom.com")
So I thought I’d share how I made it.
 by Brenda Ponnay for Alphamom.com")
Supplies to make a Creepy Eyeball Pinecone Wreath
- cardboard ring (I cut mine from a old box by tracing two large concentric bowls)
- pine cones
- spray paint in a creepy color (optional)
- floral wire
- wire cutters
- ping pong balls
- acrylic paint (skin color, and eye colors)
- a black permanent market
- hot glue* (or normal white craft glue but it takes longer)
How to make a Creepy Eyeball Pinecone Wreath for Halloween
Step 1: First I spray-painted the pine cones purple. I did this outside in a box so the over-spray would stay contained. Then I spray-painted my cardboard ring to match and let everything dry for an hour or two.
 by Brenda Ponnay for Alphamom.com")
Step 2: Next I attached the pinecones to the cardboard ring by wrapping them with floral wire and tying them off in the back. Fill the ring all the way around this way and make sure everything is secure.
Step 3: Then I painted my ping pong balls to look like eyeballs.
 by Brenda Ponnay for Alphamom.com")
I could have made classic spooky eyes with just a pupil and some scary red veins but I wanted them to look like those old-timey eyeballs you see in victorian apothecary mad scientist jars. I saw some expensive ones that you could buy from a catalogue and opted to paint my own version. Don’t worry it’s actually easier than it looks! (Especially if you aren’t a perfectionist.)
 by Brenda Ponnay for Alphamom.com")
First I painted around the ping pong ball in a skin color paint (leaving the white of the eye, un-painted). Then I painted a circle in the middle of the white area a pupil color and then a black iris on top of that. I let them dry completely (at least an hour) and then outlined the detail with a black permanent marker. As you can see I wasn’t super careful about my lines. I put some markings inside the iris for texture and then and an eyelid line on top and bottom and some eyelashes. Believe me, I thought I was doing a terrible job at the time but once I stepped back and looked at my work I kind of liked it!
 by Brenda Ponnay for Alphamom.com")
Step 4: Now it’s time to add the creepy ping pong ball eyes to your wreath. Hot glue is the easiest way to do this but if you have more time on your hands you could opt for normal white craft glue. It might be fun to add plastic spiders or even snakes too but I skipped that step because I didn’t feel like making another drive to the craft store.
Then I hung it on my front door and now we wait for Halloween!
I have a feeling this will bring all the trick or treaters to our door. I think next year I’m going to make the eyeballs light up!
Find more Halloween Decoration ideas here: