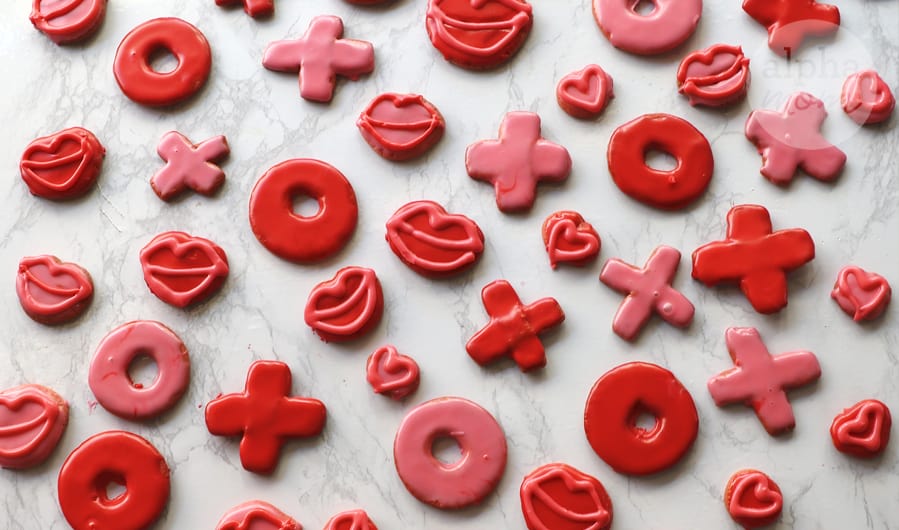
Hugs and Kisses Cookies (for Valentine’s and Every Day!)
XOXO, we love you! Can we spell it out for you with some cookies? These simple sugar cookies are super cute and pretty easy to make. You don’t even need a cookie cutter!
Here’s how to make these Valentine’s Day sugar cookies:

Step 1: First, we made some sugar cookie dough.
We used our go-to sugar cookie recipe (that you might remember from our mermaid cookies post) but you could use any recipe or even store-bought sugar cookie dough.
We divided our dough in half and added ten drops of red food coloring to one batch and five to the other.
Step 2: Next, we rolled it out onto parchment paper until the dough was a 1/4 inch thick.
We set that dough on parchment paper onto a cookie sheet and stuck it in the refrigerator for five minutes. This makes cutting the dough a lot easier.
Step 3: Then after the dough was chilled a bit we took it out and made our X cookies.
We did this by cutting thin strips of dough with a knife and then cutting short sections and criss-crossing them over each other on the cookie sheet. Just a light touch in the middle was enough to make the Xs stick together (see the picture below).

Step 4: After that, we did the same to another piece of dough but this time we cut out circles with a small juice glass and then cut out the center with the lid from a smaller vessel (we used our vanilla extract bottle). See the pictures above and below to see how.

We removed any excess dough with a knife and put it aside to roll into other cookies. If you ever start to feel like your dough is getting too soft or sticky, don’t get frustrated just pop it back in the fridge to chill for a minute or two and then start again.

Step 5: After we were done with all of our Xs and Os, we decided to make some lip-shaped cookies.
We got kind of elaborate on forming them but it turns out that the cookies rise when baked and lose most of the detail anyway so it’s not that important.

They did look pretty cute though, no?

Once the baked and cooled now it was time to glaze them! This is the magic step that really makes them pop. Of course, they are pretty cute unglazed too if you don’t feel like getting too serious into cookie decorating.
Step 6: We used this recipe for glazing/icing.
Just like the cookie dough, we divided the glaze in half and added ten drops of food coloring to one batch and five drops to the other. You can play around with the color to be less intense if you like. Then we gently dipped each cookie into the glaze and set them on a cooling rack over more parchment paper to let the excess glaze drip off. 
Step 7: When it came to decorating the lip-shaped cookies, I added some piping on top of the glaze to give them more definition.
This is kind of backward to how cookies are usually “flooded” but I think it looks just as cute. To make the piping, I just added a tablespoon of more powdered sugar to thicken it.

After the glaze had hardened a bit I set them out for the kids to play with, I mean eat.

Pretty fun, right?

xoxo,
Alpha Mom
More Valentine’s Day crafts on Alpha Mom:
1. Free Printable Lunchbox Notes, Tags & Stickers
2. A Love Letter Lunch for your Child on Valentine’s Day
3. How to Make Fortune Cookies for Valentines