How to Take Great Halloween Photos

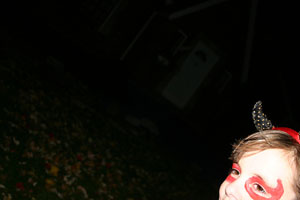
On the one hand, it’s kind of a cool photo. On the other hand, it’s not great for sending to the grandparents, who just want to see the kid’s chubby little face and cute costume.
Since I’m clearly not a pro at this photo thing, I’ve been searching for some useful Halloween photography tips. Here’s what I’ve found.
Easy Halloween Photo How-Tos
1. Tell a story. I love Kodak Canada’s idea of photographing your kid’s transformation from his everyday self into whatever character (hopefully non-licensed) he’s picked this year. Don’t wait until everyone is fully dressed to start shooting photos — document the whole crazy process. And certainly don’t wait until everyone has eaten half a pumpkin’s worth of candy to get out the camera. That’s how you end up with shots like the one of my kid.
2. Go outside. Once everyone is dressed, the smart folks at Photojojo recommend photographing your little goblins outside, just before the sun sets, when you’ll still have enough natural light to get shots without the flash to wash out their small faces. At dusk, when the sun is setting and the kids are getting excited about trick-or-treating, there’s enough light to skip the flash but not so much that it will overwhelm the glow of your jack o’ lanterns. And as a bonus, your kids are probably not all hopped up on sugar so maybe they will stand still for a couple of minutes and look cute. Who knows.
3. Get spooky. Photojojo recommends some simple lighting tricks you can use to create spooky photo effects. Try pointing a flashlight up at your kids’ faces to get that “telling a ghost story” feel in your shots. Lighting your subject with the glow of a carved pumpkin will also make for a lovely photo.
4. Put your pumpkins to work. If you’re planning to use your jack o’ lanterns as a light source for photos, carve them with that in mind. Make the eye and mouth openings large enough to let some light out, and take the top off for photos, also to let more light out. And always play it safe: Replace the candle inside your carved pumpkins with flashlights. No one wants their kid trick-or-treating as Burning Man.
5. Unmask! One last smart tip from Photojojo: If your kids are trick-or-treating with a group, take two photos of everyone all together — one with their masks on, and one without the masks. That way when they’re all in high school and are arguing about who dressed up as which Transformer for Halloween that one year, you can get out the pictures and settle it once and for all.
More Halloween Ideas on Alphamom:
- How to Make Family Vampire Portraits for a Spooky Halloween
- How to Make a Halloween Ghost Tree
- Instead of Trick-or-Treat, Try Trunk-or-Treat!
Photo source: Depositphotos/pressmaster


