DIY “Frozen” Movie-Inspired Costumes for Halloween
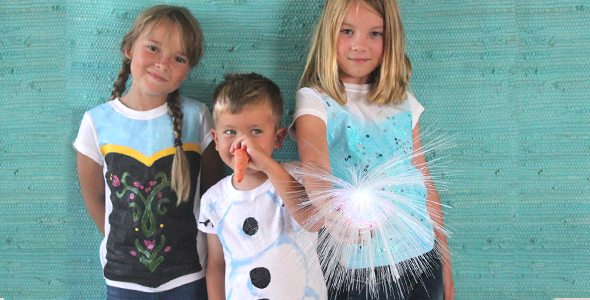
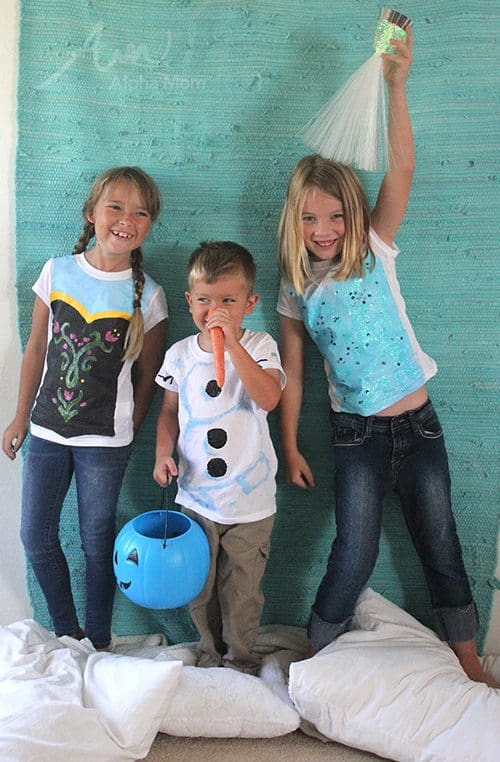
Skip the lines for Frozen-themed Halloween costumes this year! We’ve got something much more casual that will be a hit for your jeans-wearing kids. Make your own Anna, Elsa and Olaf costumes for Halloween and every day. The kids might even want to wear these costumes to school.
Supplies for Anna, Elsa and Olaf costumes
1. pre-washed white t-shirts. I bought these t-shirts online because my daughter likes a slimmer fit but you can easily pick them up at your local craft store or big box department store.
2. fabric paint in your desired colors (don’t worry I have a print out if you need something to reference – see below)
3. cardboard for inside of the t-shirts so the paint doesn’t leak through to the back of the shirt
4. glitter and/ or sequins if you are making an Elsa t-shirt
5. paintbrushes
I’d also like to note that fabric paint is extremely permanent (in a good way!). So be prepared and put paper down to protect your space and where you are working. Don’t wear your favorite clothes when you are painting and wash stains immediately before they dry. Once they are dry they are pretty much there forever. Don’t be intimidated though. Fabric paint is fun!
How to make the Anna costume/t-shirt
First slip a piece of cardboard inside your t-shirt. You’re going to be applying a lot of fabric paint and it’s probably going to soak through so you’re definitely going to need something inside your shirt to keep it from bleeding onto the other side. Even a layer of wax paper or tin foil over the cardboard won’t hurt. I started out with my print out inside the t-shirt, thinking I could trace my design and make painting easier. This was a mistake because the paint stuck to my computer print out and it was a pain to peel off later. You can use the print out for tracing purposes too but maybe just use a washable marker that you can paint over later and don’t leave the print out inside the t-shirt like I did.
Here is the guide for your Anna costume/ t-shirt. Just click and print.
You can free-hand it like I did using the above as a visual reference. You can trace it with charcoal or washable marker (removing the guide before painting) OR you can cheat and just print the guide out on iron-on paper and skip the whole painting mess altogether! But of course that will only work if your child wears an 8.5 x 11 t-shirt or if you are handy with a color copier.
First lay down the dark color of Anna’s bodice. This is a lot of paint so plan to let it dry for a good long while before you lay down your other colors on top. Fabric paint often comes in squeeze bottles but for the bodice of this costume, you’ll want it flat and not puffy so squirt yourself a good blob of paint on a paper plate and then apply it onto the shirt with a paintbrush. Once the dark black/gray is set then add your swipe of yellow at the top and blue above that.
Then after the bodice is dry you can paint in the flower decorations. You could go ahead and squeeze your vines and flowers on with curly-ques and loops. Fabric paint loves to be three-dimensional. It wants to stick up off the shirt in streaks and blobs so you can either work that way or do it like I did and paint your vines a little flatter. Both ways work. The puffy paint look might just take a little longer to dry. A good trick for making the dots is to use the other side of your paint brush. It will create a perfect circle instead of an oblong dash that the brush side will want to make. Just make sure you clean off both ends of your paintbrush when you’re done!
When you’re done painting just let your t-shirt dry (follow the instructions on your fabric paint) and you’ll be good to go!
Next up Elsa!
How to make the Elsa costume/t-shirt
Here is the guide for your Elsa costume/ t-shirt. Just click and print.
The Elsa costume/t-shirt is so easy to create that it practically paints itself. All you’ll need are two shades of light blue (aqua works too). First paint the bodice. Create a v-shape at the top. Then paint a lighter blue on top of the that v-shape. Add glitter and sequins before your paint dries (don’t worry, you’ll have plenty of time) and that’s it! Easy peasy!
How to make the Olaf costume/t-shirt
If you’re feeling extra creative, give Olaf a try! I don’t have a guide for that but if you’ve gotten this far, I’m pretty confident you can do the rest. Just paint two big rolly polly snowballs for the body, some little marshmallow shaped feet, black buttons and some puffy paint lines for stick arms!
Let it all dry while you watch Frozen on repeat and you are ready for a magical Frozen Halloween, casual-style!
***********
Difficulty Level: moderately easy
Appropriate Age levels: Teens to adults for detailed painting but littles can always join in with adding glitter and sequins!
Time allotted: half hour to 1 hour per shirt. Allow one day for drying time.
** Always paint outside or in a very well-ventilated area.
More Halloween Ideas from Alpha Mom:
- Painted Emoji Pumpkins for Halloween
- Candy Crush Halloween Costume for Kids
- Paper Bag Candy Bowls for Halloween


