Homemade Wind Chimes for Mom (Mother’s Day Gift DIY)
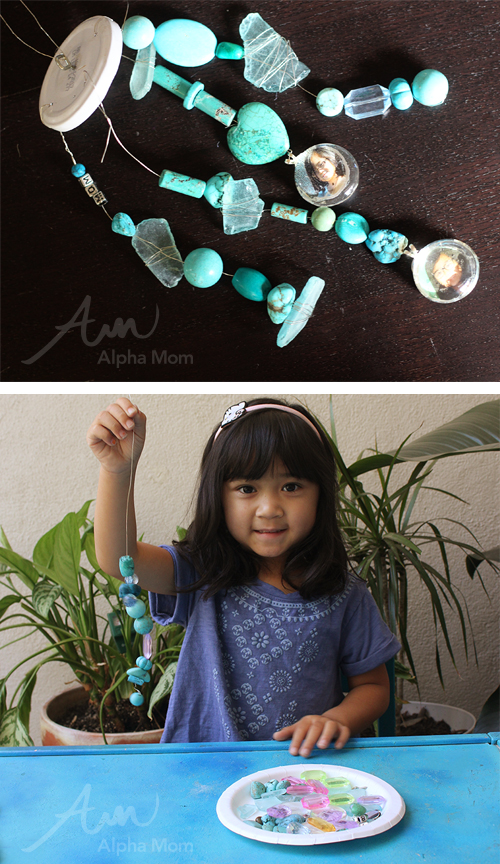
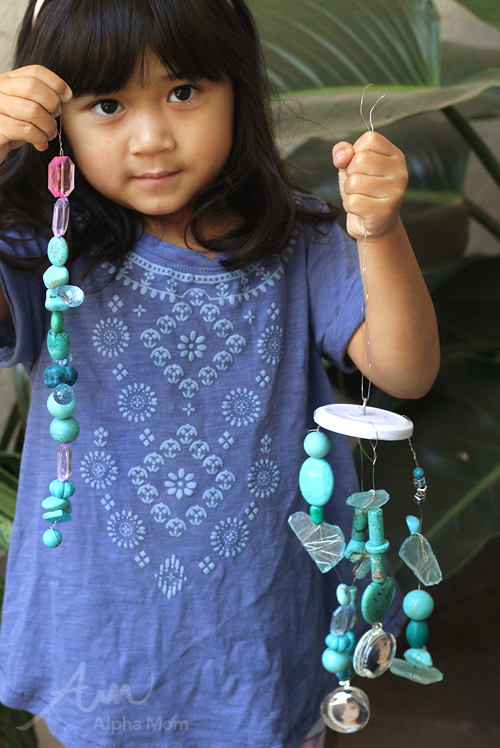
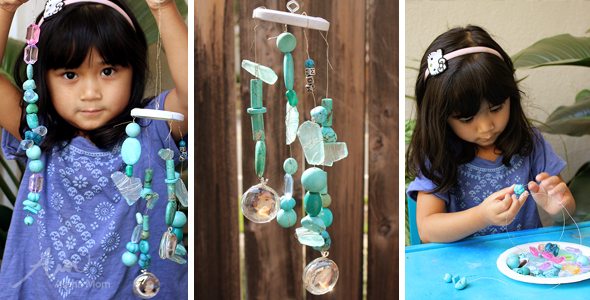
You know what is a win-win situation? Kids making baubles for their moms for Mother’s Day. Kids love to bead things and moms love beaded things! Since necklaces have been done before a million times I thought it might be sweet to make Beaded Wind Chimes for Mother’s Day. To make it even sweeter we incorporated some face bubble beads on the end! Just imagine it, mom sitting out in her garden, sipping tea as the sun catches a pretty beaded wind chime with her children’s faces smiling back at her. A great Mother’s Day craft, right?!
Step-by-step tutorial
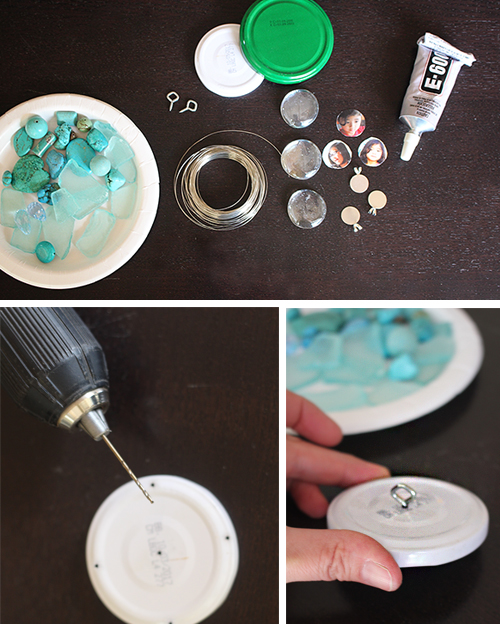
Supplies for Homemade Beaded Wind Chimes for Mom:
- pretty beads (beach glass, shells…whatever you’d like to dangle from your chime…)
- 24-gauge jewelry wire
- an eye hook
- a round lid or something you can drill holes into and dangle your chimes from
- clear, flat, round marbles
- 2-3 one-inch photos cut into circles
- Industrial-strength clear transparent glue or silicon sealant* (not to be used by children; to be handled by responsible adults only)
- pendant blanks (found in the bead section of your local craft store)
- a drill or hammer and nail (to punch holes into the lid)
- wire cutters
I know this sounds like a complicated craft by looking at the supply list. But once you have everything you need, it is actually quite simple.
Tutorial for Homemade Beaded Wind Chimes for Mom:
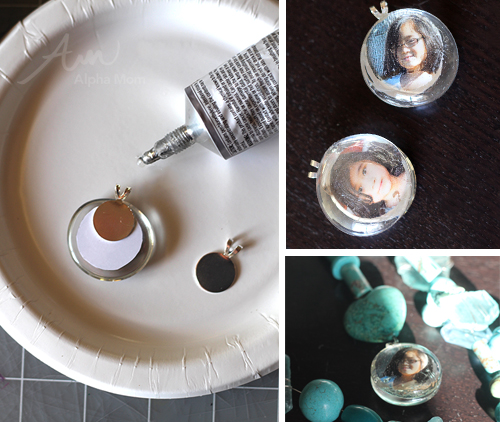
First, you’ll need to make your “Picture Jewels” because they will need time to dry completely before you hang them from your chimes. (Gravity is not your friend when you’re working with slow-drying glue.) This step is only to be done by an adult because the glue is toxic if inhaled and not for children. Make these “Picture Jewels” ahead of time either outside or in a very well-ventilated room. Once the glue is dry they are perfectly harmless for children to touch. You can follow the directions for making the “Picture Jewels” here. But instead of adhering a magnet to the back like we did on the Mother’s Day magnets, you will add a “Pendant Blank” to the middle and then sandwich another “Picture Jewel” to the other side so that both sides of the Jewel are pictures of your children’s pretty faces.
Now that your “Picture Jewels” are ready, you can get down to the business of making a wind chime! With a hammer and a nail (or a drill with a 1/16th inch drill bit if you have one) make a hole in the middle of your lid and then four holes around the side. See the above photo for reference.
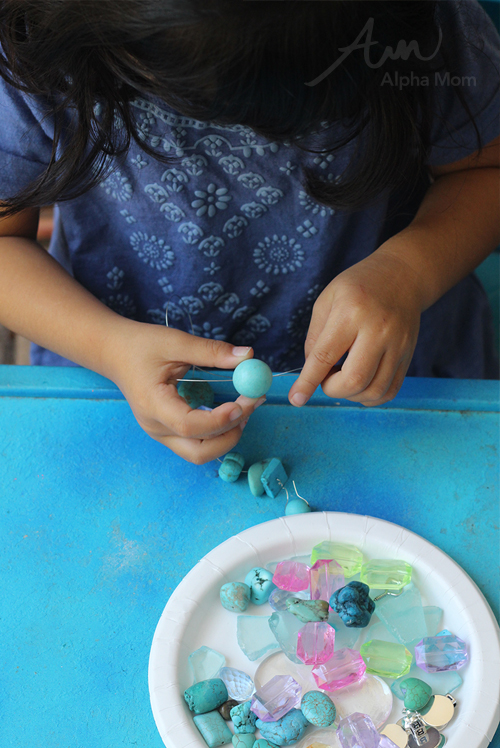
Cut four lengths of wire about half a yard long. Attach a starter bead (or Picture Jewel) at the bottom of one length and secure by looping and twisting the wire around itself. I usually do this step first before I hand it off to a child to bead the rest. Then add your beads however you like them until you get at least four or five inches of beads. You can create space between your beads by wrapping the wire around a bead to hold it in place or fill the wire up like you would a necklace. If you’re beading beach glass or a rock or a shell that doesn’t have a hole to string it from, just wrap the wire around it over and over until it’s secure.
This step is great for hand-eye coordination and fine motor skills. The wire is just stiff enough that you don’t need a needle and most children will pick it up pretty quickly. You’ll probably find that your children want to keep on beading even after their four lengths are done. (I recommend making ceiling fan danglers and other fun sun-catcher type things.)
When you’re done with the four lengths of wire, attach them to the lid making sure that any stray wires are bent and secured underneath the lid so that there are no sharp wires poking out. Then add your eye hook to the middle of the lid and use another piece of wire to create a loop to hang it with.
Then wrap it up in some pretty tissue and you’ve got a present any mother or grandmother would love! Enjoy!
(*Industrial-strength clear transparent glue is not recommended for children. Make sure you do this step before involving children in this craft.)


