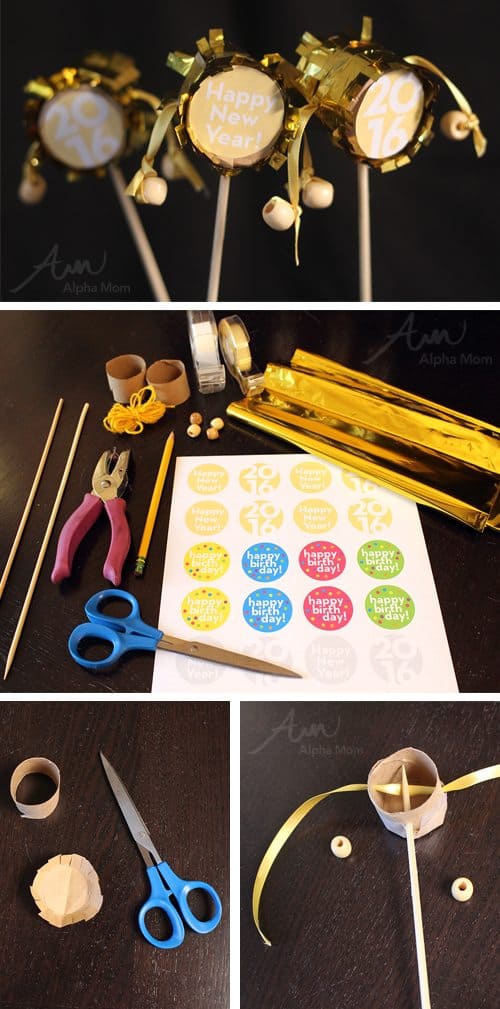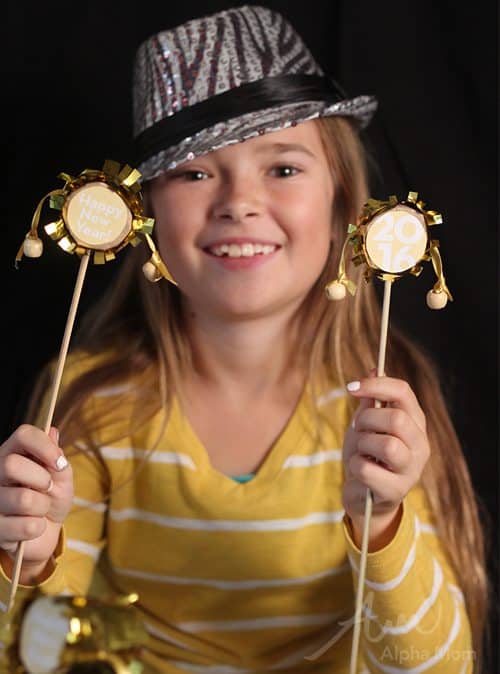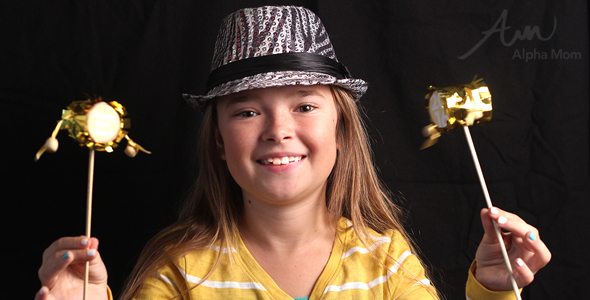
Happy New Year’s Eve Mini Rattle Drums!
It’s always fun to DIY noise-makers to celebrate New Year’s Eve, so we decided to create a modified Chinese rattle drum with a special 2016 twist. These little drums are cute and perfect for kids because they make noise but they are not anywhere as annoying as kazoos.
Plus they make great cupcake toppers and/or drink favors for a more adult party if you need them!
Click through for step-by-step tutorial directions.
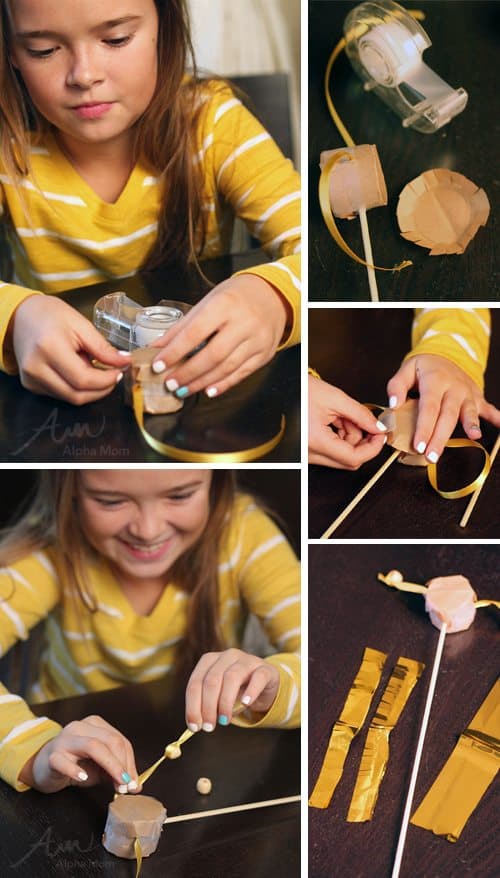
First you’ll need to gather your supplies:
- 1.5 inch cardboard tubing (toilet paper, paper towel, wrapping paper rolls etc work great)
- paper bags (not pictured)
- regular clear tape
- double stick tape
- small dowels or shish kabob sticks (straws might even work here, too)
- gold ribbon or string
- beads
- gold foil or tissue paper for decoration
- our handy happy new year 2016 printable
- small hole-punch or awl
Now you are ready to get started!
Step 1:
First cut your tubes into 1 inch segments.
Step 2:
Then cut out two circles from your paper bag for each tube. You’ll want your circles to be about a little bigger (1/4 to 1/2 inch) than the tube circle so trace your tube on the paper bag first and then cut a bigger circle around the pencil marks so you have lots of room to fold the paper bag over your tube.
Step 3:
Cut slits all around the circles stopping before you get to your pencil marks. Then fold those flaps inwards toward the center. Set aside.
Step 4:
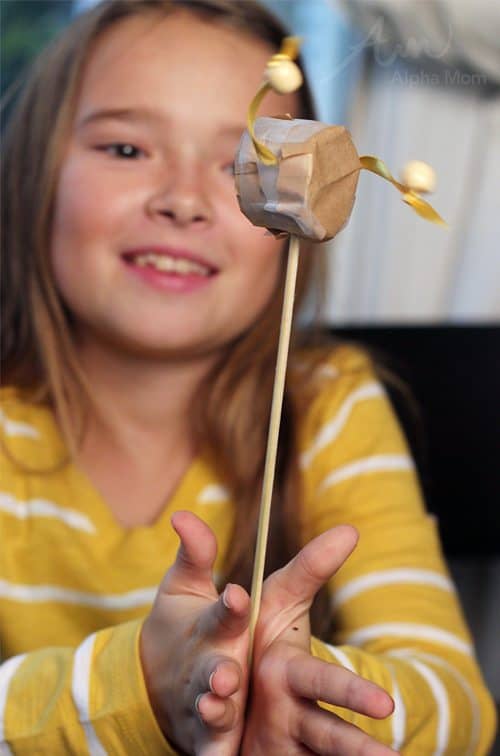
Using your small hole punch (or awl) , punch three holes into your tube. One at the bottom and two at each side. Stick your dowel or shish kabob stick through the bottom hole until it hits the top. Then take your ribbon, and thread it through the side holes leaving enough ribbon on both sides to let it fly back and forth and tie on your bead later. (2.5 to 3 inches).
Step 5:
Now you are ready to cover your tube and make it a drum. Take one paper bag circle and lay it on your drum with cut slits folding down. Carefully tape the drum top down on all sides. Be careful to place your tape in such a way that you don’t accidentally tape down the ribbon. Repeat for both sides.
Attach your beads to the ribbon ends and secure with a knot.
Give your rattle drum a test roll. It should make a nice tap tap sound. Adjust your ribbons as needed to get the best sound.
Step 6:
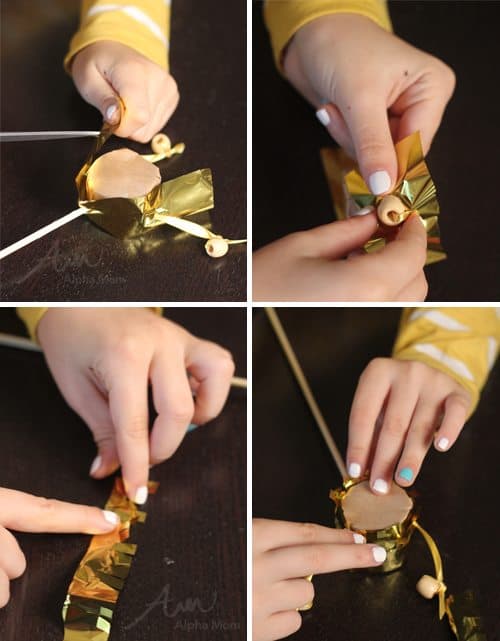
Now you’re ready to decorate! Cut two 1×6 inch pieces of foil. You can use tissue paper here too but we opted for shine foil because it’s festive. One piece of foil will cover your drum and the other will be cut in half and added for trim. For the first piece cut a small “x” in the middle and slide it over your stick. Then wrap the foil up around the sides and where it touches the ribbon cut two more x’s. Slide your beaded ribbon through the holes and secure the foil at the top with double-stick tape.
Step 7:
Then take your remaining piece of foil, fold it in half and cut tiny cuts along one side. Then cut it in half following your fold mark. Foil can be slippery and tricky so take your time and try not to get too frustrated. Don’t worry if you don’t get it perfectly when it’s all wrapped up your mistakes will be hardly noticeable.
Step 8:
Now attach your fringe pieces to your drum with double-stick tape with the fringe slightly hanging over the drum. Bend your flaps up with your fingers to make them stick up more.
Step 9:
When that is completed, cut out your decorative Happy New Year circle from our handy printable. (We also included some Happy Birthday circles in case you wanted to use this craft for other parties.) Attach with double-stick tape to both sides and you are done!
Now shake, rattle and roll yourself into the new year! Happy New Year!


