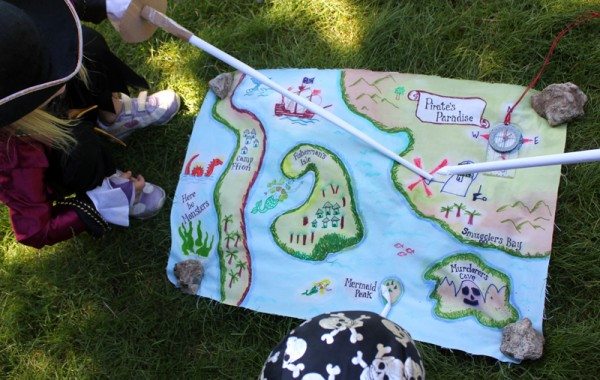
DIY Pirate Maps for Talk Like A Pirate Day
Yarrr! It be Talk Like A Pirate Day time of year again me hearties! Mark your calendars for Alpha Mom’s favorite holiday on September 19.
Last year we made newspaper swords and pirate girl bandana skirts. This year we are done with our pirate training and it’s time to find the treasure! Every good swashbuckling seadog needs a treasure map to kick off some serious pirating adventures!
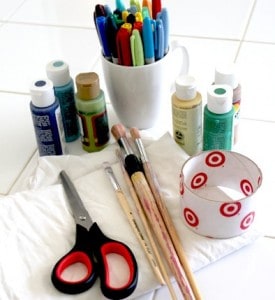
Supplies you need for DIY Pirate Maps:
All you need to make these are some permanent markers, some blue, green and tan acrylic craft paint, an old cotton pillow case and a bit of imagination.
How to Make your own Pirate Maps:
1. I cut open the pillow case and the kids got one side each to make a map from. Cotton really takes the marker and paint well. A synthetic fiber would likely still work, but I’m not sure how well it would take to being laundered afterwards. If you launder the cotton maps then the colors still stay well, which is good if your kids are charging about the yard, digging in the mud with their maps.
2. I taped the material down on the kitchen table with some paper under it to protect the table. Taping things down helped to keep the material smooth and reasonably taught while the kids drew on it. I also searched online for a few sample pirate maps and printed them out to give the kids some ideas about what they could put on their own maps. Then they were able to just go to town with the markers.
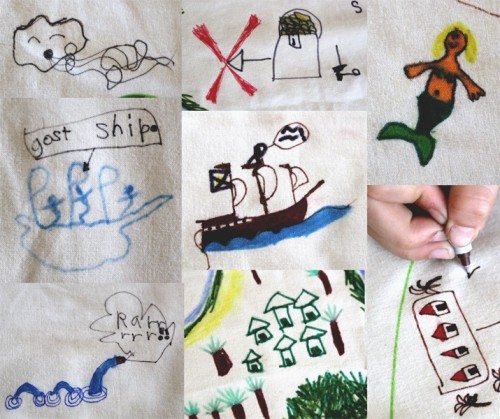
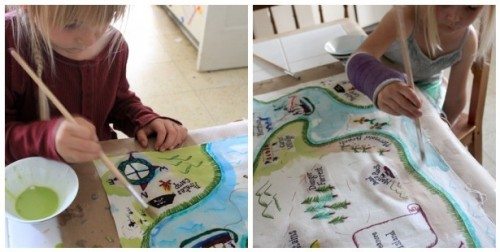
3. There’s no need to color any large areas with the markers. Just add lots of details and land marks. I helped the kids to write the place names that they wanted on their maps, and my five year old asked that I draw her a few specific things that she was having trouble with as her arm is in a cast at the moment. One of the nicest things about this project is that it’s large enough that you can all get around the table and work on it together.
These are just a few of the sweet little drawings that the kids dotted around their maps.
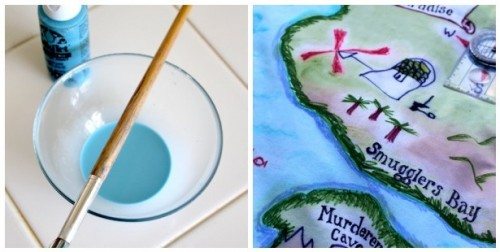
4. Once you think you are done with all your map details, you can paint in the large areas of color. We just used three colors for our maps to keep it simple. Blue for the water and tan and green for the land areas.
Just a little squeeze of acrylic paint mixed in with a decent amount of water will be enough to stain the material but still allow your drawings to show through.
If there are areas that you want to remain lighter then wet them with water first and then when you paint around them, your colors will bleed slowly into the wet area making a nice gradient. You can see this where the name labels are on the maps.
The acrylic paint is water soluble until it’s dried out, so once your maps are dry the paint will not be able to be washed out, plus being made from material rather than paper, your child’s artwork will last for much longer while they use it to have all sorts of make believe adventures. It won’t get ruined when they scrunch it up and shove it in a backpack to go treasure hunting.
If you have a back garden, why not make a piratized map of that, with lots of exciting names for mundane places. My best friend had a shed in her garden that we used to call “the monastery” when we were kids because the previous owner had written that on the key for it. It doesn’t take much to re-name your shed, compost heap, recycling bins or a random tree, but your children’s imaginations will ensure they are remembered for years to come as magical landmarks in epic adventures.
One last tip: If you have new material to do this project with, it’s best to launder it beforehand to get rid of any factory chemical residue that might prevent the markers and paint from taking to it.
Whether ye be landlubbers or salty sea dogs we hope you have fun hunting for buried treasure with your maps.


