DIY Bunny Soaps for Easter (and Every Day)
Easter Sunday this year, 2025, is April 20th.
Since we’re currently stuck inside these days for Coronavirus quarantine and washing our hands obsessively, I thought a soap-making craft might be in order. I find crafting to be very calming when I’m worried about current affairs but I know some people think crafts only add to their stress. Whichever you are, you might want to take a chance on this craft because it is very easy and you get the cutest little bunny soaps for all your efforts.
And, what could be more perfect than little bunny soaps for Easter gifts or to celebrate Spring!?
Soap gifts are great for bath times and teaching little ones that handwashing can be fun. The more you wash, the closer you get to the toy!
Let’s get started!
 by Brenda Ponnay for @alphamom")
Supplies you will need to make Bunny Soap:
- A large glass measuring cup or microwaveable bowl
- an ice cube tray
- clear melt-and-pour soap (we used this one)
- small plastic bunnies (see below for more)
- plastic flowers
- toothpicks (not shown)
- wire cutters
- a spoon to stir with
- green soap (optional)
- a microwave
")
A quick word about the bunnies. The toy that you choose to put inside your soap can make or break your craft. Cute really does matter. I liked these bunnies because they were so realistic and they truly brought me joy when I opened the package and they tumbled out onto my desk. Just make sure your toys are small enough to fit inside an ice cube tray you decide to use (as you see below).
")
How to make your own Bunny Soap
1. Place all the bunnies upside down into the tray. This only matters if you are trying to make them look like little snow globes, which I was. If you don’t care which way the bunnies stand, then you can disregard and throw them in any which way.
2. Next, tuck your plastic flowers in and around the bunnies. Use wire cutters to clip the plastic flowers short.
3. Next cut up your melt-and-pour soap into 1-inch cubes. Place a handful in your glass measuring cup or bowl and microwave on high for 40 seconds. Then stir and repeat until your soap becomes liquid. Be careful it will be hot.
4. Slowly pour your liquid into the ice cube tray until all of the bunnies are covered. Try not to over-pour. Tap the sides of the ice cube tray lightly to clear out any big bubbles.
5. Then use a toothpick to rearrange your flowers and bunnies that might have shifted while pouring. As the soap cools it will get harder and it will be easier to manipulate your flowers and toys to your liking (for example I pushed all of my flowers down so that the flower tops were going down towards the bottom of the tray and the stems were reaching upwards).
 by Brenda Ponnay for @alphamom")
6. (optional step) If you want to be extra, you could grate some green soap onto the top of the bunnies to look like grass when you flip them out. I didn’t have any green soap so I used a bar of this fancy French soap (see picture above) I had on hand that was more of an avocado green. It didn’t look like grass but on the upside, it smelled divine.
 by Brenda Ponnay for @alphamom")
7. Let your soap cool completely (about an hour or two) and then pop them out like you would regular ice cubes. If they stick use a butter knife to lightly loosen the edges. You can cheat and put them in the freezer for twenty minutes but that does make the glycerine a little more cloudy. So if you want clear soaps, hang in there.
8. Use a knife to shave off any irregularities and you are done!
9. Next up, time to package them! (My favorite part.)
 by Brenda Ponnay for @alphamom")
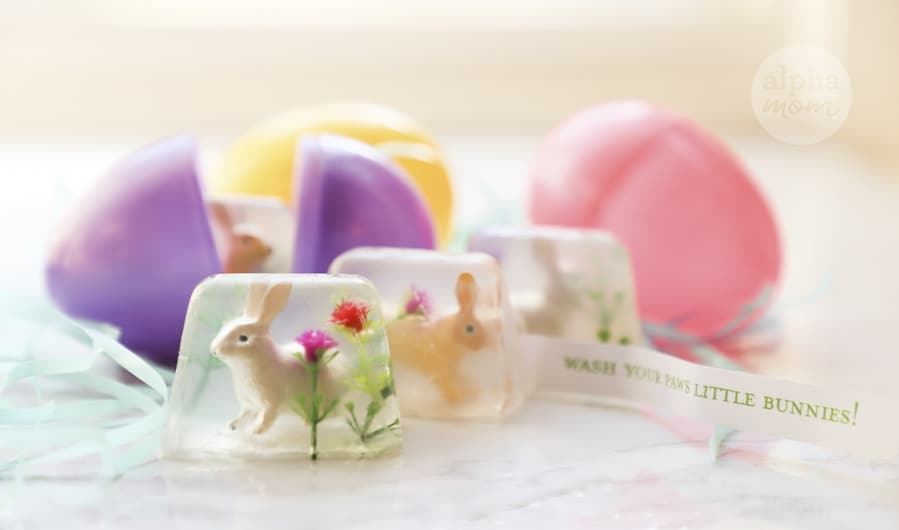
You could put them in Easter Eggs with a funny fortune.
 by Brenda Ponnay for @alphamom")
Or wrap them up in a candy bag and tie them with some twine. If you’d like to use my handy dandy printable click here.
 by Brenda Ponnay for @alphamom")
Does this craft look familiar? If it does then you might be a reader from a long time ago!
Happy Easter & Hand Washing!