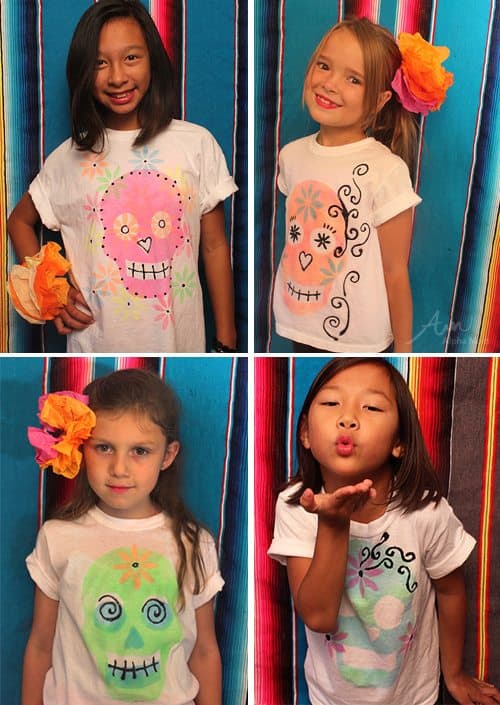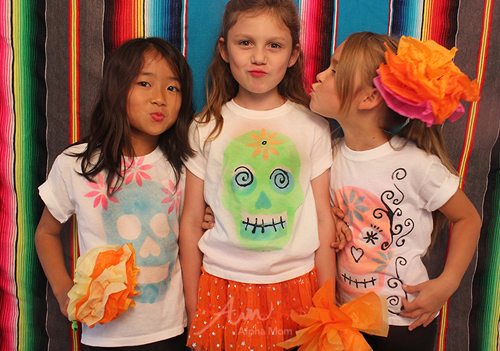
Day of the Dead DIY T-shirt for Kids Tutorial!
Dia de Los Muertos or “Day of the Dead” is a holiday celebrated in Mexico and cultures around the world to honor the dead. From October 31st to November 2nd, family and friends gather to remember their loved ones who have passed on with private alters, parades and festivals, flowers like marigolds, favorite foods and of course the well-known sugar skulls (or calaveras). In some parts of Mexico children roam the streets, knocking on doors asking for small candies and money, just like Halloween trick-or-treating.
This year as I was thinking about these sugar skulls I thought it might be fun to deconstruct them and put them back together in an art form on something you could wear. Like a t-shirt! (Some people believe it’s good luck to possess Day of The Dead items.)
Supplies for Day of the Dead T-Shirts
1. A pack of pre-washed white t-shirts (I couldn’t stop at just one)
2. spray fabric paint in neon colors
3. several pieces of cardboard (poster board or cereal box cardboard will work well too)
4. black fabric paint (squeeze bottle optional)
5. an exacto knife
6. a fine-tipped paintbrush
7. a paperweight or rock
Tutorial for Day of the Dead T-Shirts
First cover your workspace well. Fabric paint is very permanent. If it washed out, it wouldn’t be fabric paint! So make sure you are wearing clothes you don’t mind getting paint on and cover everything with a drop cloth or paper.
Next lay out your t-shirt and stick a square piece of cardboard inside the shirt to keep it stretched and smooth.
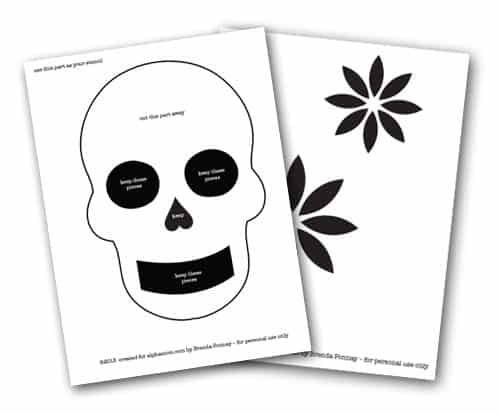
To create your stencils for spray-painting, print out our Day of the Dead sugar skull printables:
Day of the Dead Flower Stencil
Lay them over your cardboard and carefully using an exacto knife* cut out the shapes provided. With the skull template you will keep the eyes, nose and mouth pieces because you will need to place these back inside the skull before you paint. (Whatever is cardboard will be the negative space on your t-shirt.)
Before you paint make sure wherever you don’t want paint is well-covered. This might mean laying extra pieces of cardboard over the edges or weighing down your cardboard with a rock or paperweight so that the paint doesn’t accidentally fly up underneath a gap of your stencil. You want to make sure your stencil is nice and flat on your t-shirt.
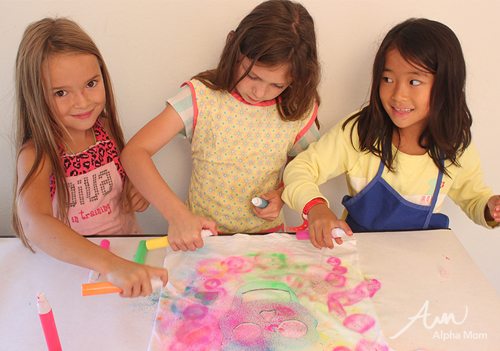
Now you’re ready to spray! The spray doesn’t always come out evenly. That’s okay. A splatter pattern makes it fun. Just spray an even layer over the skull shape and stop when you feel it’s covered. (Always paint outside or in a very well-ventilated room, and keep paint away from small children.)
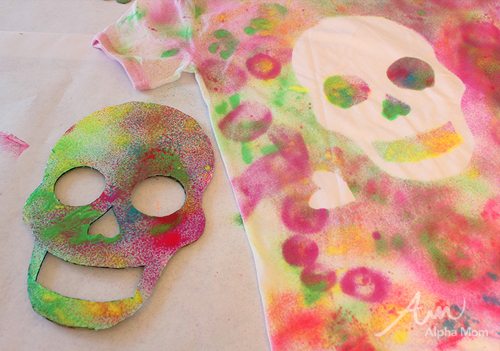
Then carefully remove your cardboard and you’ll have the relief of a skull shape. (Photo above is showing the opposite, using the cardboard skull to create negative space instead of the frame in the above photos but you get the idea). You can then overlay your flower stencil and decorate your skull Dia de Los Muertos style. Have fun!
Lastly you can add the black fabric paint with a brush or using the squeeze bottle applicator for curlique details. A word about black fabric paint: if you are happy with your skulls without the black paint I’d say stop and skip this step. I personally found the black paint frustrating and it’s so permanent. If you make one wrong move there is no fixing it. Let’s just say I added a lot of curliques where I didn’t originally intend them to be because I accidentally smudged or my squeeze-bottle applicator decided to have an air bubble. But if you feel confident with your painting skills or your squeeze-bottle applicator please proceed. It does add a nice authentic touch to these otherwise deconstructed sugar skulls.
The spray fabric paint dries pretty fast but the black puffy paint fabric does not, especially if you put it on pretty thick with the squeeze bottle applicator. If you use the squeeze bottle applicator, make sure you let the fabric dry flat for FOUR hours. This part is really important for all the warnings I’ve listed above. Fabric paint is very permanent and if you lift your t-shirts up before they are dry, sometimes the fabric likes to fold in on itself and make a mess or just plain gravity will cause things to go awry. Sometimes you can speed the dying process up with a sunny day and a hair dryer but I’d keep on the safe-side and let the painted t-shirts lay flat for the allotted time that the instructions on your paint say (usually 4 hours).
After that you’re ready to wear! And of course, take a minute to remember your relatives who have gone before. Someday you’ll want to be remembered the same way.
***********
Difficulty Level: Moderately difficult, but rewarding! This is not for the faint of heart. Have patience and carry on.
Appropriate Age levels: Teen to adult. Younger children will enjoy spraying the fabric paint but make sure you keep a very careful eye on everything because painting can get messy and permanent very quickly.
Always paint in a well-ventilated room and keep paint away from small children. Don’t wash finished t-shirts for 72 hours after completed. Turn inside out for best results.
*Exacto knives are sharp. Always have a responsible adult handle sharp blades
Discover More Day of the Dead Crafts Here:
- DIY Necklace to Celebrate Day of the Dead
- Dia De Los Muertos Masks
- Day of the Dead Sugar Skull Art Blocks


