Easy Spring Flower Garland DIY
I’ve got Spring Fever in the worst way so I decided to liven up some white walls in my house with an easy spring tissue paper garland. So easy to make!

You can make one too!
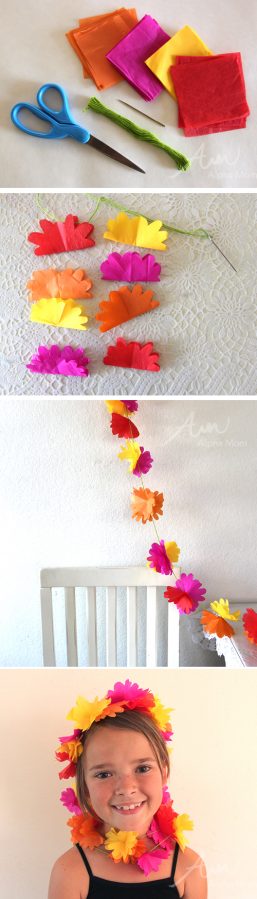
Supplies to make Spring Flower Garland:
1. several small squares of colorful tissue paper (mine are roughly 2-3 inches but any size will work. Go big! Go pastel! You can do this!)
2. embroider floss in green
3. scissors
4. a cute kid to model your handiwork
This is so easy I really don’t need to write a tutorial but if you’re feeling uneasy about what to do first, you could follow these steps.
Tutorial for Spring Flower Garland:
First, fold two squares of tissue paper in half and then half again. Scallop the edges that are not folded with your scissors. This will make your flower. Unfold it and shift your tissue paper sheets slightly so the petals don’t match up. This will create a little more volume to your flower. If you’d like even more volume, use more sheets of tissue per flower. I stuck to two because I was more interested in getting it done quickly. Then poke your threaded needle through the middle of your flower and slightly crinkle up the petals up towards your thread. Move these flowers along your thread to where you think they look nice. Add more flowers until you’ve reached your desired length. You can create a pattern with your colors or do it randomly like I did. Then hang your garland and your house will instantly be transported from a dismal gray day to beautiful Spring!
We loved this garland so much I’m thinking I might have to plan a tropical garden party to go with it!

Happy Spring!