
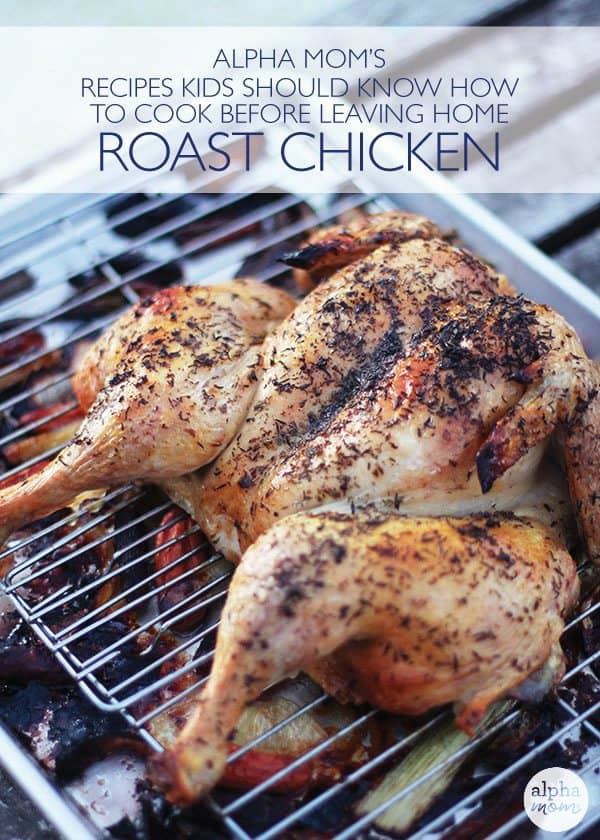
How to Roast a Chicken (Recipes Kids Should Know Before Leaving Home)
I don’t know how many times I’ve heard a chef say, “The one thing every person should know how to cook is a roast chicken.” Because of this I have tried many times to master the art of the roast chicken…and failed. These same chefs share recipes and techniques, which I have dutifully tried. But the chicken never comes out as great as I would hope. Roasting a chicken just isn’t as simple as these chefs make it sound.
Until now!
I have finally found the key to wonderfully roasted whole chicken and I’m going to share my secrets with you. At first pass the process may seem complicated, but I promise it is not hard at all. I feel confident that with the tricks I’m about to share, you will not only learn how to roast a chicken, but you will learn how to roast it the best way possible. Kids, you will be surprising adults left and right!
What is the trick to the best Roast Chicken?
There are three tricks to roasting chicken well:
- Spatchcock, a.k.a. Butterfly, the bird
- Dry brine
- Use a thermometer
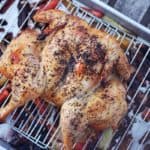
1. Spatchcock, a.k.a. Butterfly, the bird
So, what the heck is spatchcock? When you spatchcock (or butterfly) a turkey or chicken, it means that you cut out the back bone and cook the bird flat. Normally when you roast a chicken whole without spatchcocking, the dark meat is tucked up under the bird and the breast meat is more exposed to the heat. This means the breast meat cooks faster than the dark meat, so by the time the dark meat is fully cooked you end up with dried out white meat. By cutting out the backbone and cooking the bird flat, the dark meat is more exposed to the heat and cooks in the same amount of time as the breast meat. This means both the dark meat and the white meat will be juicy and delicious!
This video shows you how to cut the backbone out of a chicken. If you are in middle or high school, you can probably do it yourself, but please try it with an adult at least once! If you are in elementary school, have a parent help you! Alternatively, the butcher at the grocery store can be very helpful. When you buy the chicken, ask if they can cut the backbone out for you. That is definitely the easiest way!
2. Dry Brine
Brining is the process of adding salt to your chicken, which both seasons the meat as well keeps the meat moist while cooking. Many people use a wet brine, which involves soaking the bird in salty water. However, a dry brine is more effective and easier. Dry brining is not as common and people will question if it works as well. Stick to your guns: dry brining is better than wet brining, hands down!
Dry brining your chicken is super simple – you just sprinkle a ton of salt all over the bird and let it sit for at least 1 hour, or up to 24 hours. That’s it! Done! (More details in the recipe below.)
3. Use a Thermometer
The very best way to know if the chicken is cooked all the way through but not overcooked (i.e. dried out!) is to use a thermometer. You can use a meat thermometer and keep it in the bird throughout cooking or use an instant read thermometer and check it periodically. I have an instant read thermometer that can stay in the chicken while cooking and has an alarm, so it goes off for the temperature I set (in this case 150ºF).
There you go! The secrets to perfectly roasted chicken! Here is the recipe so you can do it yourself!

Roasted Butterfly Chicken
There are three tricks to being able to roast a whole chicken well: butterfly (also known as spatchcock), dry brine and using a thermometer. It may sound complicated but it is simple and easy and yields the best results! Click here for a video showing how to butterfly a chicken for Step 1 below.
Ingredients
- 1 whole chicken
- 2 tablespoons olive or canola oil
- 1/2 tablespoon pepper
- 1 tablespoon dried thyme
- 1 tablespoon dried sage
- 1 tablespoon dried parsley
- 2 tablespoons salt
- 4 carrots, cut into large pieces (optional)
- 1 onion, quartered (optional)
- 4 stalks celery, cut into large pieces (optional)
Instructions
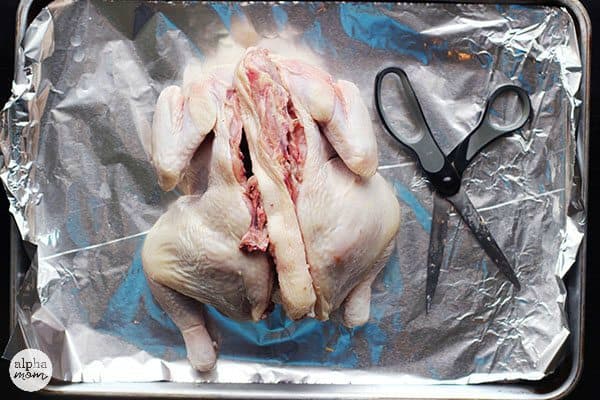
- To butterfly/spatchcock the chicken: unwrap a whole chicken and place on a large rimmed plate or rimmed baking sheet. Place bird breast side down (you’ll be able to see the wings well). Using kitchen scissors, cut out the backbone by cutting along both sides of the backbone, cutting right through the bones. Throw away backbone or save to make chicken stock (another post for another day!). You have to be forceful and should have an adult help you cut out the backbone. Click on the link in the recipe summary above for a video showing how to butterfly a chicken. Alternatively, you can ask the butcher at your grocery store to cut out the backbone for you – just ask them to keep the rest of the chicken intact.
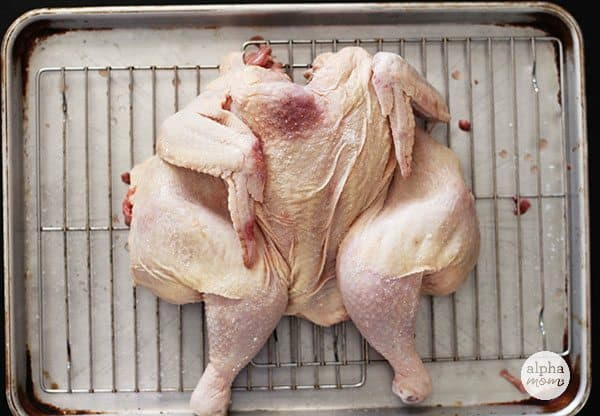
- To dry brine the chicken: Lay the chicken breast side up (now you’ll be able to see the legs better than the wings) on the rimmed plate or baking sheet. Press firmly straight down on the breast bone to flatten out the bird. Wash hands well then sprinkle generously with salt, coating the entire bird well with a nice thick layer. Place chicken in the fridge and let sit for at least 1 hour and up to 24 hours. (I usually do this in the morning and then roast the chicken in the evening.)
- About an hour before you plan to cook the chicken, remove the chicken from the fridge and let sit at room temperature. (If you forget to do this, that is fine…the chicken will just take a little longer to cook.)
- Preheat oven to 400ºF.
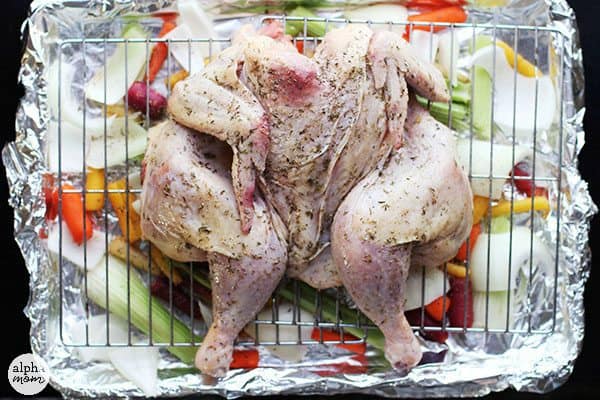
- Place a rack on a rimmed baking sheet, then lay the chicken on the rack. (I use two cookie cooling racks that fit into my baking sheets.) Brush oil all over chicken and then sprinkle evenly with parsley, sage, thyme and pepper (measurements for the oil, herbs and pepper above are approximate, adjust if necessary). Once you’ve sprinkled the pepper and herbs on the chicken, kind of rub them into the oil a little bit with your hands, then wash your hands well! If you want to make an au jus or gravy from the drippings (another post for another day!), place some aromatics (carrots, onion and celery) under the rack before putting the chicken on the rack. It’s best to try to keep the aromatics directly under the bird so they don’t burn as the chicken roasts. (Note: the carrots will be delicious after the chicken roasts!)
- Place in chicken preheated oven and bake for about 1 hour, until chicken breast temperature reaches 150ºF. I use an oven-safe instant-read thermometer, placing it in the thickest part of the chicken breast. I set my thermometer for 150ºF and just wait until the alarm goes off. That’s when you know it is done! Also, as the chicken is roasting, if any parts of the skin are getting too dark, cover the chicken with some foil. If you remember to take the chicken out of the fridge an our before cooking you will most likely not need to do this.
- Remove chicken from oven and let sit for at least 10 minutes before cutting. Enjoy!
Find more Recipes Kids Should Know How to Make Before Leaving Home here.