Get This Actual, Real-World Look: Bare Minerals for Day & Night
While I have still not personally used the INSANELY POPULAR Bare Minerals line (I’ve had weird itchy reactions to bismuth in the past and am just a little askeered of what slathering it all over my face might do), when Tara volunteered an eye-makeup demo using the line, I knew a lot of y’all would EAT THAT UP. So I asked her to do two, because I am a slave driver. Mean. Demanding. Etc. And I have to say, I am muy mucho impressed with how awesome her eyes look. Like impressed enough that I may reconsider my fear of allergic reactions and test this stuff out. For science. And the good of the people.
So here they are: looks for both day and night using Bare Minerals, courtesy of Tara. She took a TON of photos, clearly documenting each and every step (including how much product you want on the brush, which I’ve heard can be a tricky part of the Bare Minerals line), but in order to not bring down the AlphaMom server in a single swoop, I’ve only included a few of them here. You can see the entire process and the rest of the photos at her Shutterfly account (no login required!).
Photo Slideshow for Day Look
Okay, so if you are using the full Bare Minerals line, I start my eye looks after applying my foundation, concealer (including under-eye concealer), and blush, but before applying Mineral Veil. Actually, Mineral Veil falls within these steps, but since it’s not relevant to the eye look itself, I’ll just note where that occurs. All products listed can be found on the Sephora or QVC websites.
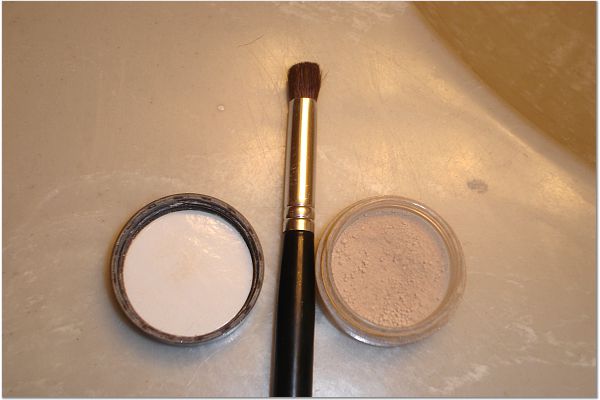
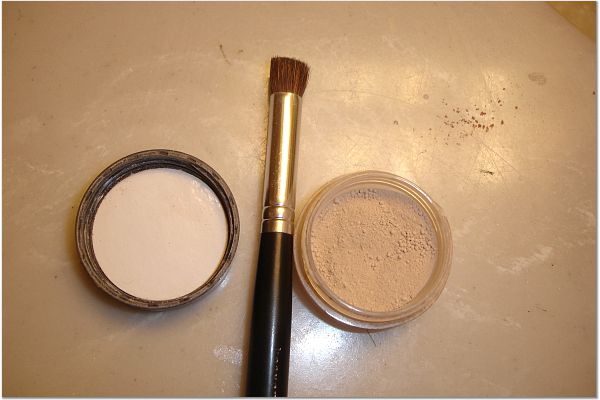
Start out by using Well-Rested as your eyeshadow base. Dip the Heavenly Buffing Eyeshadow brush directly into the pot. Then do the buffing action on the container lid and tap to remove excess. Starting at the outer corner of your eye, sweep the brush along the lashline to the inner corner. You can then go back and forth over your entire eyelid (lashline to eyebrows) to get full coverage. If you have overslept or are really pressed for time, you can apply your Mineral Veil and then your mascara and be out the door. If you have 2 more minutes, continue on!
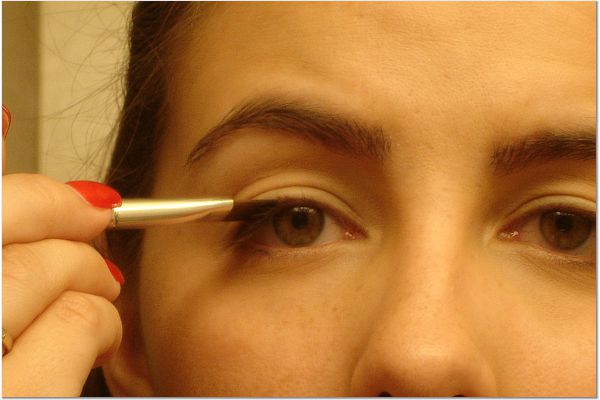
Next, apply your eyeliner. Dip the Full-Edged Liner Shadow brush into the pot of Retro liner. Swipe the brush back and forth and side-to-side on the lid and tap. Retro is not fun to have flake off under your eyes, especially if you’ve already done your concealer! With the pointed end at your outer corner, tuck the brush right above your lashes. The brush will pretty much be on top of your lashes. With light strokes, swipe the brush to the middle of your lashline. Then flip your brush so the pointed end is at your inner corner. I find pulling the eyelid a little allows me to get the brush at the base of my lashes here. Again, swipe with light strokes to the center of your eye. Go over the line again for a smooth look.
I also line under my eyes. Again with the pointed end toward your outer corner, apply the liner with short strokes. Only continue the line to where you can still see your lashes, not all the way to the inner corner. The trick here is that you are making your lower lashes look darker, not lining under your eyes.

Eyeshadow is next! I use two eyeshadows for a normal look: one from lashline to crease and one from brows to crease. First up, the lower part of your lid. Dip the Wet/Dry Shadow brush into the pot of Precious glimmer shadow. (If this is too glittery-looking for you, try Faux Fox eyeshadow.) Buff and tap on the lid, as you did earlier. Sweep the brush on your lid, from the outer corner to inner, and up to the crease. If you go a little beyond the crease, that’s okay. These are natural colors, so it won’t be noticeable.
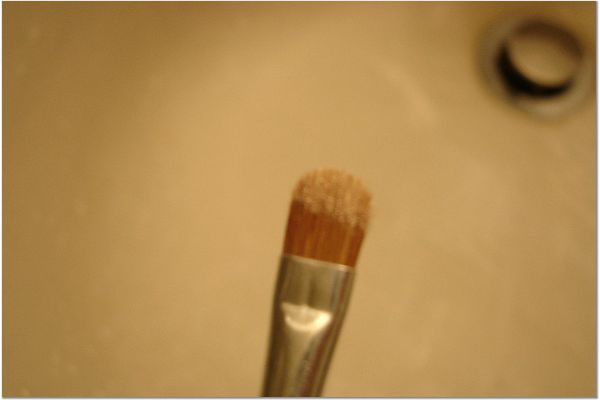
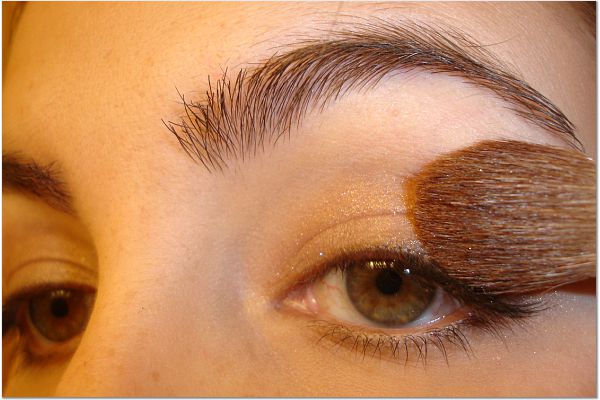
The second eyeshadow is Nude Beach glimmer shadow (or Cashmere eyeshadow for a less glittery version) applied with the Tapered Shadow brush. Dip directly into the shadow and buff and tap on the container lid. Sweep the brush under your brows, starting at the arch and working to the outer corners. Then go back and apply at the inner corner and above the crease.

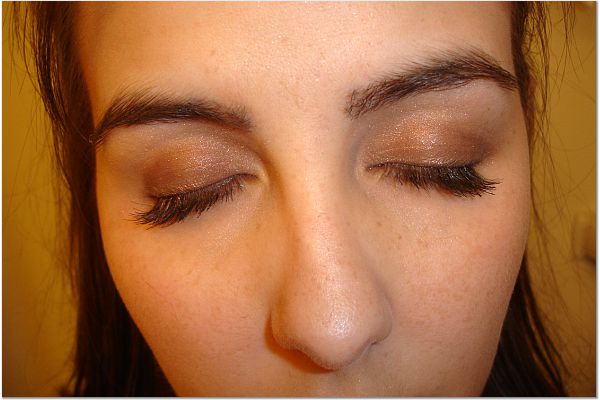
If you use the full line of Bare Minerals, go ahead and apply your Mineral Veil. This way, none of the powder will inadvertently stick to your wet lashes. Once that’s done, apply your favorite black mascara (I used Weather Everything Waterproof mascara). Apply your mascara only to your top lashes, starting at the outer corners again. Ta-Da! You are ready to face the day!
Photo Slideshow for Night Look
The day and night looks use the same techniques. Once you do one, you can do the other! The only differences are the amount of eyeliner used and the colors of the eyeshadows. I also followed Amalah’s tips for applying false lashes before I started my make-up. Figured I’d give it a whirl and it worked great!
Start out by using Well-Rested as your eyeshadow base. Dip the Heavenly Buffing Eyeshadow brush directly into the pot. Then do the buffing action on the container lid and tap to remove excess. Starting at the outer corner of your eye, sweep the brush along the lashline to the inner corner. You can then go back and forth over your entire eyelid (lashline to eyebrows) to get full coverage.
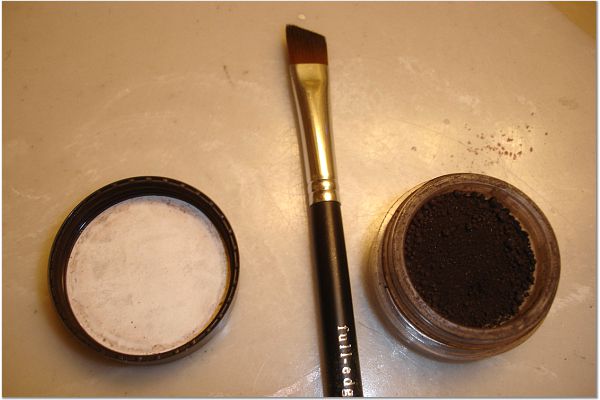
Next, apply your eyeliner. Dip the Full-Edged Liner Shadow brush into the pot of Retro liner. Swipe the brush back and forth and side-to-side on the lid and tap. Retro is not fun to have flake off under your eyes, especially if you’ve already done your concealer! With the pointed end at your outer corner, tuck the brush right above your lashes. The brush will pretty much be on top of your lashes. With light strokes, swipe the brush to the middle of your lashline. Then flip your brush so the pointed end is at your inner corner. I find pulling the eyelid a little allows me to get the brush at the base of my lashes here. Again, swipe with light strokes to the center of your eye. Go over the line twice more for a darker and smoother look.
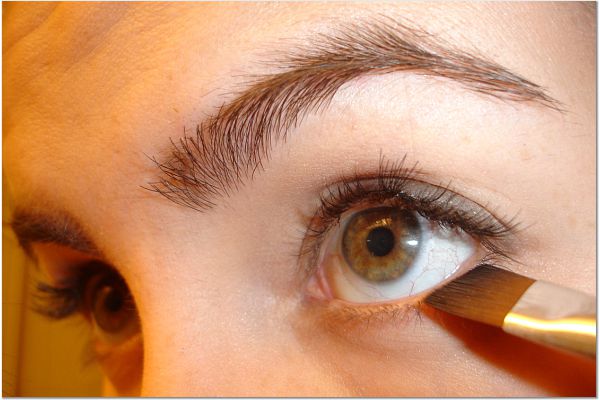
I also line under my eyes. Again with the pointed end toward your outer corner, apply the liner with short strokes. Only continue the line to where you can still see your lashes, not all the way to the inner corner. The trick here is that you are making your lower lashes look darker, not lining under your eyes. Sweep your brush across the container lid to get a bit more liner at the outer corner of your eyes. Since this is a more dramatic night look, I recommend using more liner than you used for the day look.
Eyeshadow is next! For a night look, I’ve thrown another shadow into the mix, but that is optional. First up, the lower part of your lid. Dip the Wet/Dry Shadow brush into the pot of Queen Tiffany glimmer shadow. (If this is too glittery-looking for you, try Camp or Java eyeshadows.) Buff and tap on the lid, as you did earlier. Sweep the brush on your lid, from the outer corner to inner, and up to the crease. If you go a little beyond the crease, that’s okay. It will help blend the colors.
The second eyeshadow is Sex Kitten glimmer shadow (or Tiger Lily for a less glittery version) applied with the Blending brush. This is primarily an accent layer, a touch of color to tie in with your outfit. I wore an orange top for this demo, so Sex Kitten complemented that look. You could also use True Gold, Purrfect, Devotion, or Liberty for a similar look. Dip directly into the shadow and buff and tap on the container lid. Starting at the outer corners, sweep the brush along the lashline. This brush is wide enough that one stroke should cover from lashline to crease. Again, if you go a little above your crease, that’s okay.
The final eyeshadow is Nude Beach glimmer shadow (or Cashmere eyeshadow for a less glittery version) applied with the Tapered Shadow brush. Dip directly into the shadow and buff and tap on the container lid. Sweep the brush under your brows, starting at the arch and working to the outer corners. Then go back and apply at the inner corner and above the crease.
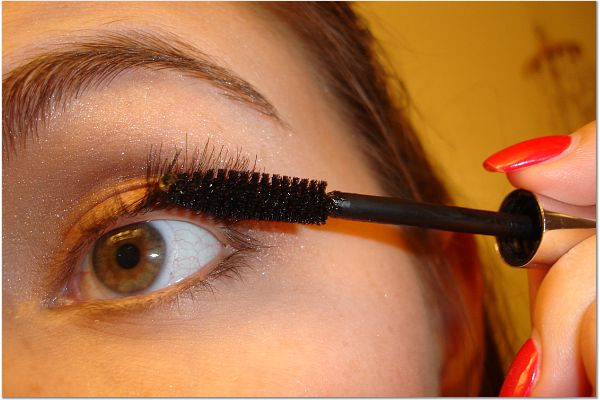
If you use the full line of Bare Minerals, go ahead and apply your Mineral Veil. Once that’s done, apply your favorite black mascara (I used Weather Everything Waterproof mascara). Apply your mascara only to your top lashes, starting at the outer corners again. Don’t put mascara on your bottom lashes! In a hot, smoky bar, that is just asking for the raccoon look! Besides, you already darkened your bottom lashes with the liner earlier. That’s it! You’re ready for a night on the town!