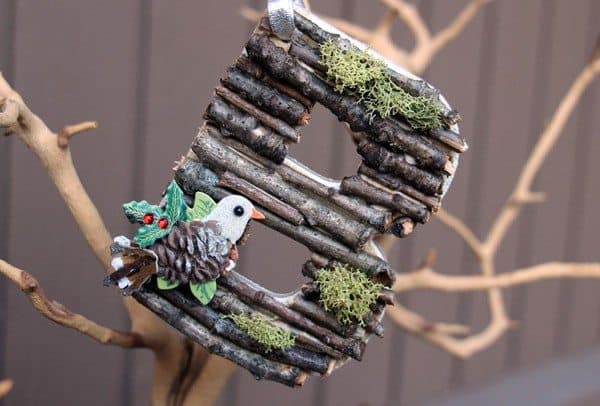
Woodland Monogram Ornaments
Bring a little of the outdoors inside with these cute woodsy monogram ornaments. To make them pull wood sticks from your yard or pick them up from the ground in a neighborhood park then pair them with a few items from the craft store.

Supplies you will need for ornaments:
- 3-4 inch wood or chipboard letters
- wood glue — I used this because it was what I had on hand; I’m guessing Elmer’s school glue would probably work fine. Be sure to choose glue that dries clear.
- thin sticks, no more than about 1/4 inch in diameter
- ribbon
- cute, dimensional stickers — candy canes, snowmen, snowflakes, animals, etc.
- decorative moss

Tutorial for making wood ornaments:
Begin by poking holes in your letters so that you can string ribbon through them for hanging. This is a job that is better for grown-ups to do.
Next, break the sticks into short lengths of approximately the same width as the letters. This is a great task for kids! You can just break them by bending them, or if you want to be a little more precise you can cut the sticks part way with a pair of scissors and break them apart the rest of the way. I found it was helpful to break a bunch of sticks all at once so we had a nice pile with different lengths to choose from when we started the gluing.

Add a thick layer of glue to a small section of the letter. Don’t cover the hole you punched!

Add pieces of sticks the same width as the letter to cover the glue. Press the sticks into the glue for a few seconds to make sure they’re really stuck to the letter. If a bit of glue squeezes up into the space between the sticks that’s OK. It will help secure the sticks in place and it will dry clear so it won’t be noticeable.

Continue attaching sticks until the entire letter is covered. A few tips:
- Be careful not to cover the hole that you’ll put the string through when you’re adding sticks because it will be very hard — if not impossible — to get the ribbon through once it has dried. Ask me how I know!
- I think the letters look good when the sticks overhang the outer edges of the letter a little, but be careful the keep the sticks flush with the inner edges. Even a slight overhang can end up obscuring the holes in the middle of letters (A, B, G, R, etc.).
- Placing the sticks on the letters horizontally generally works much better than placing them vertically. Smaller sticks tend to attach to the flat surface of the letter better and it’s also easier to cut them down to the right length.

You’ll find that some sticks don’t nestle together as well as others which can result in gaps that allow the base letter to show through. Tuck small pieces of decorative moss into these spaces to cover them up. Make sure they are connecting to the glue on the base so they’ll stay put!

Allow the letters to sit for a few hours until the glue has dried completely.

Cut a piece of ribbon about 6-7 inches long. Thread it through the hole in the top of the letter and tie it to create a loop for hanging.

Add stickers to decorate the letter.

Hang the ornaments on a Christmas tree, in a window or use them as a super fancy tag on a gift.