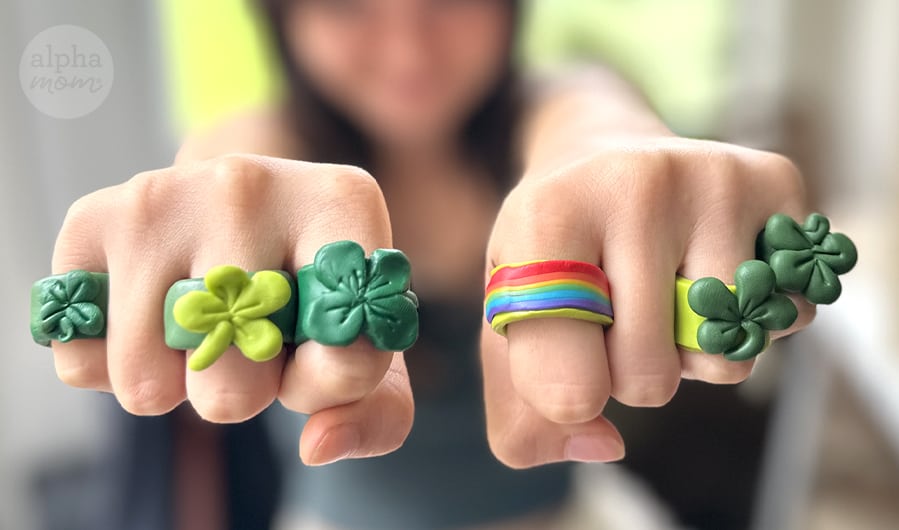
St. Patrick’s Day Craft: Big Chunky Clover Rings
I’m not an expert at molding and manipulating polymer clay, in fact this is only the second time I’ve ever worked with it. But I was pleasantly surprised at how these chunky St. Patrick’s Day-inspired rings turned out. You don’t have to be an expert to try this craft. You don’t need to buy the recommended tools either… though they help!
Here are the recommended supplies to make this craft:
- Polymer Clay (I bought this kid-friendly brand as well as a pack of “professional grade,” I didn’t notice much difference other than the kid-friendly version was softer and a tiny bit glossier)
- a brayer or rolling pin (I wish I had bought this, but I used a drinking glass and a tube of make-up to roll my clay
- soft nubby tools for smoothing and indenting the clay
- a dinner knife or plastic knife for cutting
- a regular kitchen oven
How to Make Four-Leaf Clover Clay Rings:
1. First you need to warm up the clay until it’s soft and pliable. This will take a few minutes. Squish it in your hands, knead it on a surface…You’ll know it’s ready when you can bend the clay, and it doesn’t break. You might have to work a little longer if you live in a cold climate. You want it to be smooth and soft.
2. Next roll your ball of clay out flat with your brayer or rolling pin (or water glass), until it’s about an eighth of an inch thick. Then take your knife and cut half-inch strips. Pull the strips up and wrap a strip around your finger to measure how long you need. Cut the strip just a quarter inch longer than the circumference of your finger.
3. Join the ends of the ring with a quarter-inch overlap. Smooth all the rough edges and the overlap until everything is smooth. Be careful not to overwork the clay as it will start to mis-shapen your ring. Just gentle smoothing.
If you want to make a rainbow ring, make six long skinny noodles in red, orange, yellow, green, blue, and purple clay. The narrower your noodles, the better. We aren’t making arm cuffs, though that might be another fun project. Then, roll the noodles flat into a slab and repeat the ring-smoothing steps above.
4. Now for the lucky four-clover part! Roll four tiny pea-sized balls. Pinch them into tear-drop shapes. Then, gently squish your tear-drop shapes in the middle and add a tiny stem. Attach the clover to your rings, then use a flexible tip tool to put a vertical indent in the middle of each leaf (see picture above). Smooth out the fingerprints with your soft nubby tool.
5. Now it’s time to bake! Preheat your oven to 250 degrees Fahrenheit. (For safety, please make sure you are baking the polymer clay in a very well-ventilated room and open the windows.)
Lay your rings on a tinfoil lined sheet and place in the center of your oven. Bake at 250 for 15 minutes. Then, raise the temperature to 265 and bake another 15 minutes.
6. Let cool naturally once out of the oven.
Stack as many rings as comfortable, and you are ready for St. Patrick’s Day! There is no pinching going on here.


