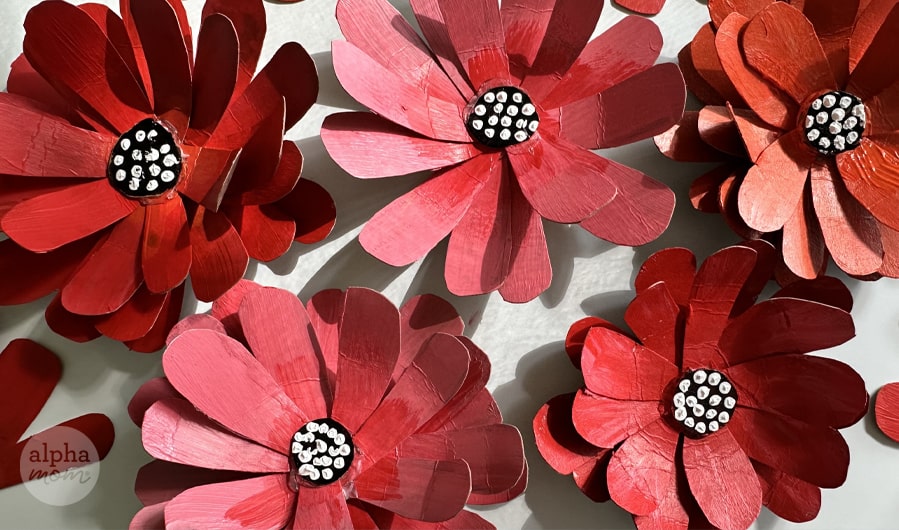
Pretty Recycled Cardboard Flowers Pins for Mother’s Day
There is nothing I like more than a recycled cardboard craft. Someday, I want to be one of those artists who recycles every piece of trash that goes through my house, but until then, I am recycling every chipboard box that comes into my home.
What is chipboard, you ask? It’s the thin cardboard that everyday items like cereal, pizza, k-cups for your coffee maker, granola bars, crackers, etc… come in. We have a lot of it in our homes! Running to a craft store to buy cardstock is unnecessary when an abundance lives in your recycling. It’s the perfect weight for creating so many crafts!
Like cardboard flowers for a handmade Mother’s Day gift!
Supplies you’ll need to make this Mother’s Day craft:
- chipboard
- scissors
- a hot glue gun (or any craft glue)– please use hot glue gun with adult supervision
- non-toxic craft paint
- pin (not pictured) I used a safety pin, but these adhesive back bar pins would work even better.
Let’s get started!
How to Make Recycled Cardboard Flowers Pins:
1. First, cut your chipboard down into two-inch thick strips. Then, cut them again into petal-sized rectangles, any size you like. I made mine about 1 inch wide by 2.5 inches long.
2. Then, cut one end rounded and the other tapered like a petal; depending on what kind of flower you want to make, you can cut as few as five petals or as many as a hundred or more. I wanted something cosmos flower-like, so I cut about twenty petals for mine.
3. Then paint the petals! Thick acrylic paint will cover the printing of the box well, but any craft paint will work. (please paint outdoors or in a very well-ventilated area). You might need more coats of paint if you are using less expensive paint. Or you might be like me and appreciate a bit of the box printing showing through for recycling brag points.
I painted mine my favorite colors, of course. Red and pink!
You could skip this step and paint the flower later when it’s all together. I tried it both ways and didn’t favor one method over the other. Painting the petals beforehand was fastidious and required parchment paper, so my petals didn’t stick to the surface I was painting on. Painting the finished flower was a bit messy but doable.
4. Now it’s time to glue your petals together. I cut a small chipboard circle for the bottom and glued each petal one by one around in a clockwise circle. After one circle was done I glued another circle on top of that and then added another cardboard circle on top as the flower’s center (see picture above).
5. I painted the center black and then added some white dots because I thought it made them prettier but you could paint them any way you like.
Using the handle end of a paintbrush is an easy way to paint dots quickly and easily.
6. Then I “fluffed” the petals by gently bending each petal upwards and inwards towards the center (see the picture above).
7. I attached a pin to the back with glue and another strip of cardboard over the pin to secure it (see the picture above) .
You could also add a hairclip instead of a pin and use them as decorative shoe clips (maybe flowers a little smaller than these) or a hair decoration!
I love this craft so much that I think I might create a wall installation with them, but that’s just my love of recycling and art.
Happy Mother’s Day and Happy Crafting, every day!


