To Bee or Not to Bee
Dear Amy,
I am a huge fan of Amy Winehouse, I sing out loud in the car, at home and to my preschooler all the time. What does this have to do with beauty you may ask.
Its about her ‘do, I need a beehive. My life will not go on without one. I cannot seem to find any reliable links on the internet, or how-to videos and I have been laughed out of my favorite hair salon when I asked for one. I have the raw materials needed, longish hair, hot rollers, fine toothed comb for the teasing, several cans of spray. I lack the knowledge.
Really this is a practical hairdo for me as I often channel Donna Reed while in my role of Domestic Goddess, complete with the pearls and organza apron.
Please, please oh wise one. Help me fulfill my dreams.
Thanks,
Melissa
I’ve gone on record here as not being very skilled at updos, but several years of high school theatrical performances actually left me with some beehive knowledge.
What I’m guessing (hoping) you really want is not so much the perfectly flawless two-foot-tall beehive of olden days, but rather a more modern version. Versatile and messier, but still a little kitsch. (Amy Winehouse’s beehive is practically deconstructed, and I totally agree with you — it rocks.) And good news: a basic beehive is actually — believe it or not — really easy to do.
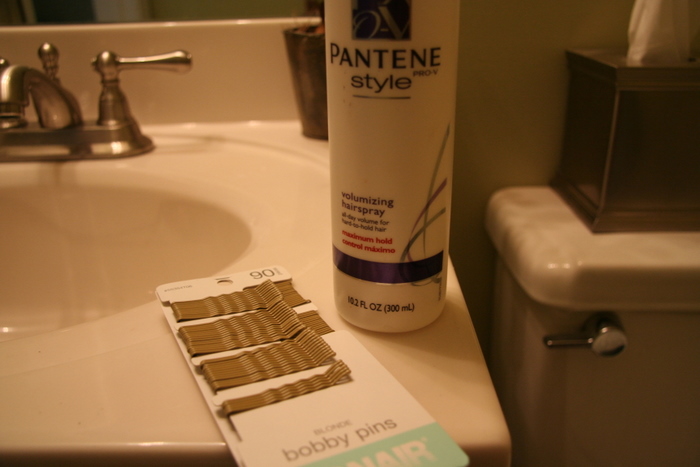
You’ve got some of the right tools — I’d maybe swap the fine-tooth comb for a regular brush, and add in some volumizing products. (The Pureology Root Lift I reviewed on Monday is absolutely perfect for this.) Oh, and you’ll also need some bobby pins and various other fasteners, depending on how you want to finish the back of your ‘do. (More on that later.)
The only other thing you’ll need is a reckless disregard for the health of your hair and absolutely no fear of inevitable breakage and split ends. Got it? Okay. Let’s do this thang.
(Also, I’ve included photos of my very own self to demonstrate, but let me add the caveat that my haircut is NOT particularly well-suited for a beehive. I have short layers cut around my face and a very strong natural part. This means is that your beehive will probably look better and more dramatic than mine.)
First of all, consider letting your hair get a little dirty before attempting this. Wash it the night before, or use a product like Bumble & Bumble Surf Spray to add a little gritty texture.
Apply the Pureology mousse on wet hair, roots to ends. Blow-dry upside down with a round brush to create as much natural height and volume as possible. For a bigger ‘do, set with hot rollers. For something a little more casual, feel free to skip them. (I didn’t use them for this demo, by the way.)
Next up is the back-brushing. Or teasing, but it’s a little different than what you might think of as teasing. “Teasing” can mean jabbing your comb backwards a few times at your roots for a little lift. Back-brushing means holding a clump of hair straight up by the ends, and brushing ends to roots in one looong stroke. And then doing that again and again until you’re left holding maybe two individual hairs. And a huge-ass rat’s nest of hair down by your scalp. Then pick up another patch of hair and repeat and repeat until you look sort of like this:
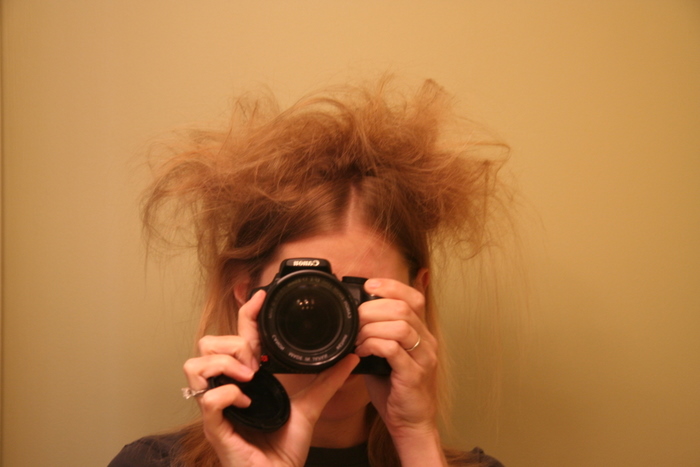
You’ll notice I teased the entire top of my head and about a quarter of the way down the sides. You could do more or less. It’s all about how much bigness the rest of your hair can adequately cover.
I started teasing a few inches back from my forehead, but if you don’t have the short layer problem I do, you could start the back-brushing closer. The first couple times you attempt a beehive, though, it’s best to tease as little as possible, since it’s way WAY easier to go back and tease more than it is to brush this ridiculousness out.
(Amy Winehouse, by the way, leaves her bangs completely alone and just does an over-the-top pouf much further back.)
Next, coax all that teased hair into a ball on the top of your head. Spray the everloving hell out of it. Maybe use a bobby pin to tuck under any long straight ends that may be sticking out. Whatever, really, because it’s not like any of this is going to show. You’re building the foundation of the hive, so try to get the height and shape you want now, before you have to worry about getting things smooth and pretty.
Now it’s time to cover the rat’s nest. This is the part that just takes practice, as there isn’t really any trick to it. I like using my brush to pull the hair over, but you could just use your hands. Pin the ends behind your pouf — two bobby pins in an X-like formation usually can do the trick for me, particularly if I can stick them into the teased hair. Use more if you have to though. (I use blonde-colored bobby pins for precisely this reason. They aren’t as noticiable if I end up using four dozen of them.)
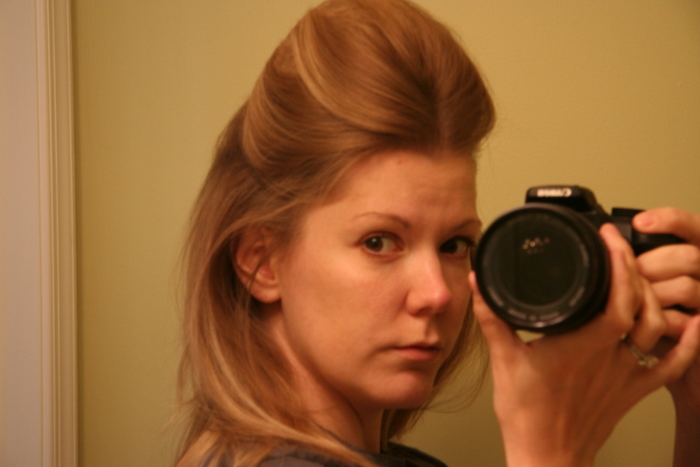
Ideally you should pin your hair farther back than mine is here — again, short layers in front = bad beehive haircut.
After your hair is pinned, use a wide, flat brush to finish smoothing the outer hair and cover the pouf. And again, spray the everloving hell out of it. This is where I really struggle with my part, as you can tell, because my hair waaaants to part in the middle unless I’m pulling it back really tightly, which I can’t do because of the shortness, and arrrgh.)
Now all that’s left is finishing up the back. And you can do that any way you want. A high ponytail up by the bobby pins is super cute. Pinning the sides back and twisting everything into a chignon or French twist makes it very sleek and classic. Hell, you can leave it all down if you want (especially if you used hot rollers). Cover the bobby pins with a bow or barrette or tie a scarf around your head or whatever else you can dream up.
I’m a total updo idiot, so I’m partial to the full-proof hair clip method. I brushed all the remaining hair back loosely, then twisted it and secured it with a small claw clip, like a poor man’s French twist. I flipped the ends under with a curling iron and ta-da! A beehive. Not a very big or over-the-top beehive, but one that I could wear comfortably with a retro sundress or a cute tank and jeans.
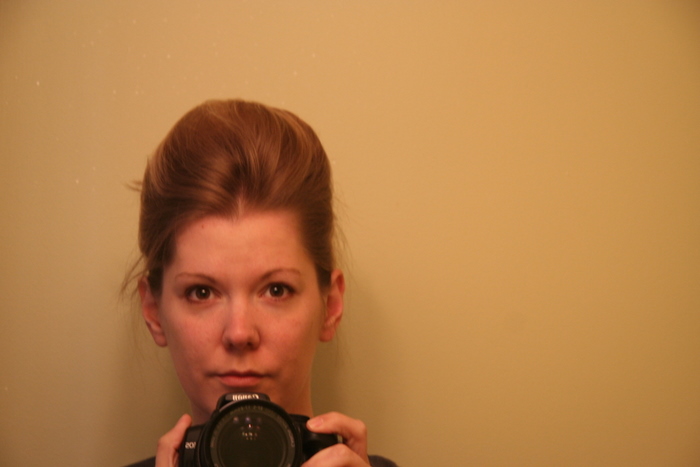
From the front. (Some smoothing cream would fix those flyaways, but eh.)

From the side.
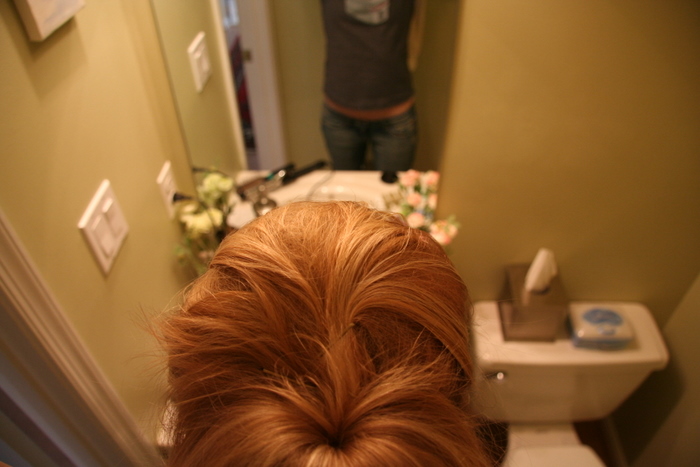
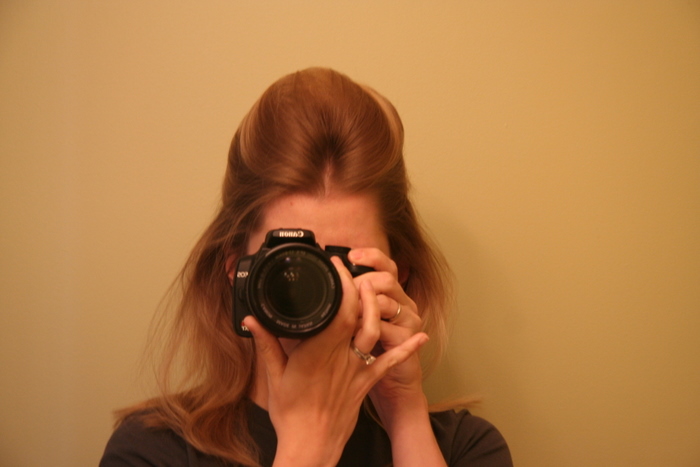
From the top, sort of. My toilet says hello.
The sky’s the limit, obviously — depending on the length of your hair and how much back-brushing you’re willing to subject your hair to. The steps are the same.
In the old days, women used to sleep with their heads in pillowcases or wrapped up in toilet paper to extend the life of their ‘dos. Uh, good luck with that.
If you’re just playing with the beehive as an occasional style, though, you must be GENTLE when you comb it out. Wet your comb or brush and start at the ends, brushing out no more than one inch at a time, until you get down to the roots. Detanglers or leave-in conditioners help too. Then treat your hair to a nice deep-conditioning treatment and promise it that next time you get tempted to beehive you’ll say no, no, no. You’ll be lying, of course, but your hair knows you’re no good.