Beauty 101: The Elusive At-Home Pedicure
(We have a super-extra-mega-special guest Advice Smackdowner today, y’all…the sublimely hilarious and deeply awesome Jen Lancaster of Jennsylvania.com AND your local book-retailing-type shoppe. I love her. I command you to love her too.)
Dear Amy,
Uh-oh. I haven’t noticed my toes in ages (since it’s been winter an all) and it wasn’t until last week that I realized I never removed the pedicure I got back in the fall… and the dreaded flaky white icky toenails have set in. Is there anything I can do to help it clear up faster? Because it’s finally getting warm out again and I want to wear my cute shoes and I honestly don’t think I can take it much longer. Any minute now I’ll just paint over them and make it worse.
Cute shoes, Amy! Languishing in my closet! Help us!
Reaching for the OPI,
Cordelia
With her inbox full of pedicure-related questions such as the above, Amalah decided to consult an expert.
Finding none, she consulted me. While I’m not the Queen of Everything, I rock the home pedicure and I’m here to help.
First, the obvious– a salon pedicure done with high-quality nail polish and sparkling clean implements will eliminate all of the above problems. Plus if you want a fantastic way to relax and unwind yet are uncomfortable with the idea of strangers pawing your naked flesh (e.g. massage, salt scrub, thermal wrap, etc.) and don’t want to have to fix your makeup or avoid sunlight afterwards (facial, microdermabrasion) then the spa pedicure is for you.
 Seriously, there’s nothing more luxurious than sitting in a massage chair (a throne, if you will), plunging your feet into a toasty-warm whirlpool, and having someone else do the dirty work. A professional pedicure is closest you’ll ever come to feeling like Marie Antoinette, despite the fact no one in the nail shop will consent to feed you freshly-peeled grapes. (Even if you ask nicely.)
But occasionally due to time and budget constraints — or the overwhelming suspicion you’re being mocked in a foreign langage — you’ve got to take your feet into your own hands. The key to a successful home pedicure is like any other home improvement projects; some knowledge, a little confidence, and the right tools for the job. I’ll provide the first two; your favorite retailer can fix you up with the rest.
To begin, remove any excess polish and place your feet in warm, soapy water for about twenty minutes to soften the rough bits. Because of a stupid commercial, for years I thought I was supposed to use dish washing liquid until it occurred to me I was taking care of a body part and not scrubbing a dirty plate. My current choice is Philosophy’s Go Go Banana 3-in-1 product.
Should you prefer not to smell like a fruit Popsicle, I’m also a big fan of Dr. Bronner’s Eucalyptus Organic Liquid soap. If you use Dr. Bronners, drop in some Aura Cacia Organics’ Tea Tree Oil to make the soaking part super-invigorating and aroma-therapeutic.
Next up, wash your feet with a scrub. I likeDr. Scholl’s For Her Pumice Foot Scrub, but really, any granular product is good. Then, give the your heels and the balls of your feet (and any other rough parts) a once-over with some sort of abrasive, like a pumice stone or loofah.
At this point you might be tempted to try a callus tool. STEP AWAY FROM THE RAZOR. Remember what happened the first time you shaved your legs or plucked your eyebrows? Take those results, only add a lot more blood. (And limping.) If your calluses are particularly thick, instead hit them with a callus file every morning in the shower and your feet will be baby-soft.
Now that your tootsies are clean, dry, and smooth, this is when the nail salon would apply a heavy cream, and possibly wrap them in a hot towel to make the moisture sink in. (Heaven!) However, any lotion you put on will have to be removed from your nails to make the polish stick, so I find it easier to skip this part, going straight to the filing.
 Yes, that’s right. I said filing. I was in my 20’s before I realized you could file your toenails and not just clip them. If your nails are too long, use clippers first, but if not, I’m a fan of the simple metal file, which can also be used to clean under the nail. Emery boards are fine, too, and the big, puffy ones are particularly easy to handle. Follow up with a quick swipe of the Sephora Nail Scoop Cleaner. (I dare you not to become addicted to using it.)
Shape-wise, I file fairly square with slightly rounded edges and I let the nail extend to the end of my toe in order to avoid the ingrown toenails that happen when cut too short. Whatever shape you choose, be sure to do it consistently on each toe.
If your nails are white and flaky, this could mean a couple of things. Sometimes your nails react to having polish on for too long, particularly if you’ve used a formula with formaldehyde-based hardener. The good news is the flakes can be removed by buffing with a emery square. Flakes can also point to a fungus, which generally can also be filed off, but run it past your physician first to be sure because you certainly don’t want a weird fungus to cause you to suddenly spout a lot of gibberish from your front-row seat on the American Idol panel. (You’ve been warned.)
Next up, we separate the amateurs from the pros with the cuticle! Did you know your toes had cuticles? Well, they do and they need to be gently pushed back on a routine basis for your toes to look groomed. I dig the Sephora Cuticle Tool but there are lots of other brands from which to choose. After your cuticles are out of the way, trim up any excess hangnail with a cuticle nipper, keeping in mind if you cut it and it bleeds, you went too far. (Trust me, you’ll only do it wrong once.) I have the Tweezerman cuticle nipper and also one from Sephora and both work well.
Finally, it’s polish-time! If you want to use toe separators, put ’em on. But if they hurt when you jam them between your toes, skip them. This is the part where I should tell you to apply a clear base coat, but I won’t because I HATE base coat. I find it extremely difficult to work with and I can never get it on evenly, thus my polish never looks smooth when I use it. Everything I’ve tried is too thick and increases drying time exponentially. Plus, less-dry nails are nails more likely to chip, so, see you in hell, base coat!

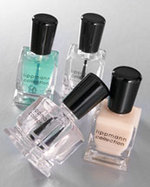
To avoid chipping, I buy better brands of polish. I’m now head-over-heels in love with the Lippmann Collection especially their Dark Side of the Moon color. It’s the perfect deep-wine-bordering-on-black shade and is far prettier than Chanel’s Vamp or OPI’s Lincoln Park After Dark. (If chipping is an issue when you get a professional manicure, bring your own polish – that way if there’s a repair needed, you can touch it up yourself. Or, use a lighter shade so small flaws are less noticeable.)
When applying polish, leave a tiny amount of space between nail and cuticle to avoid getting the color on your skin. If you paint your toe and not your nail, simply swipe it off with your thumbnail. Do the thinnest coat you can muster and don’t worry if it doesn’t cover all the way. That will fix itself when you go back with a second coat after the first coat is no longer tacky to the touch. Once the second coat is dry, finish off with a top coat. I adore Sally Hansen’s Mega Shine because it’s quick drying and exceptionally shiny. I always re-use it a couple of days into my pedicure because it totally freshens up the color.
Again, the steps provided involve some time and effort and the capital investment to purchase all the tools is equal to the cost of one professional pedicure. And if you allow no luxuries in your life save for one, I’d highly recommend leaving this to the experts. However, once you’ve gotten comfortable with the techniques, you won’t have to stress over missing a salon visit and your cutest spring shoes can finally come out of the closet.
(this would be a great place to put the photo of your Prada sandals, don’t you think, Amy?)
(or possibly a blurb about the book.)

I agree, Jen! With the second part, anyway, because SCREW YOU HATERS. You can (and should) buy Jen’s latest book: Bright Lights, Big Ass: A Self-Indulgent, Surly, Ex-Sorority Girl’s Guide to Why it Often Sucks in the City, or Who are These Idiots and Why Do They All Live Next Door to Me?, which is in stores NOW and all over the damn Internet. She sent me one of those early advance copies that make me feel so special and important, since I get to read a book before anyone else, and I would never lie to you, Smackdownateers, this book is FUNNY and HILARIOUS and YOU BUY NOW.)
(The Advice Smackdown: quickly becoming the most bossiest site on the Internet re: how to spend your money.)

