Make Your Own Mother’s Day Necklaces
My two young daughters and I have become mildly addicted to making little necklaces of late. It’s a great, simple crafting project that even the littlest ones can take part in (my girls are six and three), and the finished product makes great gifts (if you can bear to part with them.)
For our most recent creations, we used three items: sueded cord, metallic cord (I like the selection from Darice) and wooden beads. We wanted to create more sophisticated necklaces in honor of Mother’s Day, but the possibilities are endless in terms of color combinations. The girls love selecting the beads, and my oldest is especially fond of braiding the cord.
Supplies
(All available at most craft stores like Jo-Ann Fabrics or Michaels)
• Metallic Cord
• Sueded Cording
• Natural Wood Beads
• Scissors
• Tape


We start by narrowing down our color palette. For these necklaces, we chose lavender suede cord and a gold and silver metallic cord with natural wooden beads. We’ve done the same cord colors with hot pink, kelly green and cobalt blue wooden beads as well, which was a fun bolder look.
Once we select our colors, I set all of our supplies out on the table so the girls can focus on creating and everything stays (somewhat) corralled.
Now, let’s get started!

The first step in creating the necklace is to braid the cord. You’ll want to cut off one 14 inch strip of the metallic cord and two 14 inch strips of the sueded cord. If in doubt of how long you want the necklace, it’s better to cut longer pieces, as you can always cut off extra cord at the end. You’ll then line up one piece of suede cord, one piece of metallic cord and then the other piece of suede on a flat work surface and tape them down securely. I usually start the braid and let my oldest daughter take over. Once the full length is braided, you can use scotch tape to tape off each end of the cord so the braid doesn’t unravel.
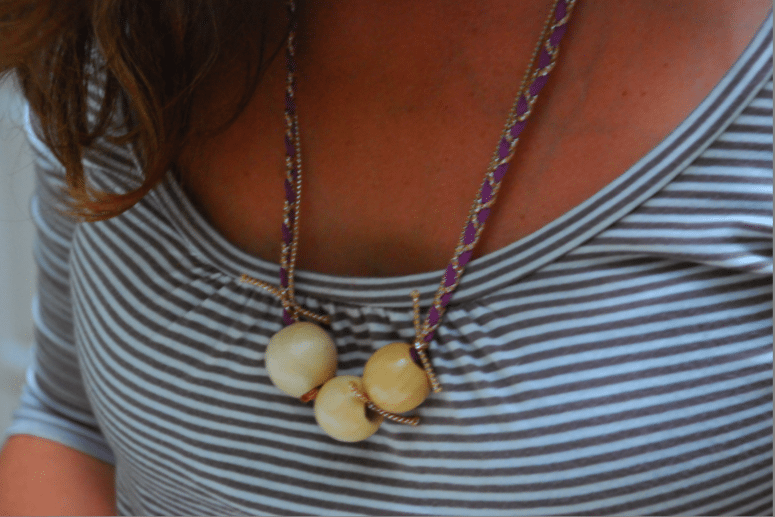
Once the braided piece is secured with tape you can easily slide on the beads. If using natural beads, a longer necklace looks great with three beads, and we loved a shorter style using five beads. You can experiment here a bit to see what looks best.

Once we added all the beads, we further embellished our creations by tying small pieces of the metallic cord between each bead and then trimming the cord so that the pieces were about a half an inch.
Once you have the beads and cord in place, you can hold the necklace up to the wearer to determine the best length. Since I do this project with the girls, we forgo complicated clasps and simply remove the tape from the ends of the cord and tie the necklace into a double knot.
The necklaces are super simple, fun and garner loads of compliments!
