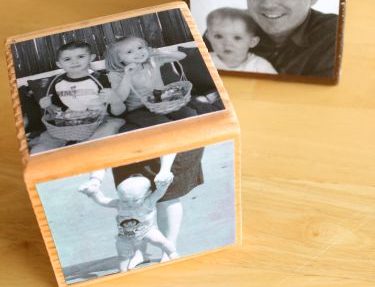
Handmade Photo Cube
I remember my Grandma having one of those old school photo cubes, the kind where you can see an image from every side, slipping the photo under the plastic frame. Well, I thought I’d re-create that for a fun Mother’s Day present, but with the magic of Mod Podge. (This would make a great handmade Father’s Day gift, too).
")
Supplies for Photo Cube
* square block of wood – I got my wood blocks from Home Depot. I bought a 4×4 piece of wood and the nice man cut it into cubes for me! Then I sanded each one down.
* 6 photos – You can either use real photos or print some off on your computer. The real photos are best as the ink won’t smear at all, but on the photos that smeared a little, looked kind of old fashioned, which I like.
* Mod Podge & sponge paint brush.
") Photo Cube DIY Tutorial
Photo Cube DIY Tutorial
1. For your wood block, you can paint it first or leave it plain. I did both, just to see the difference. For the brown acrylic painted block, I added a little water to the paint to make it more of a stained look. Or these would be cute with pink or blue paint, or even some fun scrapbook paper mod podged on first, under the photo.
")
2.Cut out your photos to fit the cube. I cut my first one out then matched it up to the others, cutting them all out at the same size.
")
3. Apply mod podge with your sponge brush to the wood square. Then press one of the photos in place. You can do about 3 of these at a time, then let them dry. Then apply and press the other 3 photos. If you dry your block on wax paper, it will come off a little easier than on newspaper.
")
4. Once the all the photos have been applied and dried, apply one more coat of mod podge to the whole cube in sections. Then let it dry over night, making sure it’s dry and sealed.
")
Now it’s ready for a Mom! She’s going to love seeing those cute faces. But she’ll probably have a hard time deciding which picture to display on top!
")