Lunar New Year Craft: Year of the Snake Puppet DIY!
The Lunar New Year is right around the corner and since it’s The Year of the Snake we thought we’d make a puppet that moves and wiggles just like a snake!
Here is what you will need:

• 12 (or more) small plastic or paper cups
• yarn needle
• 1 yard (or more) thin ribbon or yarn that will fit through a yarn needle in red or gold
• red tissue paper
• white glue
• chopsticks
• scissors
• wide paint brush
• googly eyes
• gold glitter
• hot glue gun (optional**)

First, you’ll want to organize your cups. Wait. Stacking them is not part of this craft!! But it’s fun so go ahead and have at a stack or two. When you are done stacking them and knocking them down you’ll just want to make sure you have enough cups to create a nice long body. We chose twelve because that’s how much patience we had but you are welcome to create a hundred-cup-log snake if you like. That would be impressive!

Next you’ll need to prepare your tissue paper. Cut several strips 1-2 inches wide depending on the size of your cups. We covered our cups with two layers of tissue paper. One underneath just covering up the white of the cup and one on top, fringed to look more festive. Really, you can cover the cups any way you like. You could even paint them or use those party cups that are already red (shortcut!!). Just make sure your snake is red because red is symbolic of the Chinese New Year.
According to legend, a child wearing red scared away a mythical beast called Nian or “Year” in Chinese. Nian came every new year to devour the crops, livestock and even children. Naturally, when the Chinese learned that Nian was afraid of the color red they decorated everything with that color and still do to this day.

So let’s decorate our snake in red! First you’ll need to paint on a swipe of white glue along the narrow end of the cup, all the way around.

Then gently wrap a piece of un-fringed tissue around the cup by sticking the edge in the glue. You’ll want to make sure that the edge of the tissue touches or hangs over the rim and no white is left showing. Because the cup is narrow at the bottom and wider at the top you’ll have to make up for that difference by gently scrunching or overlapping the tissue around the narrower end. Don’t worry too much about getting it perfect because the fringed layer will cover that and you can always trim excess off with your scissors.

Now paint another swipe of glue on top of that layer of tissue and apply your fringed layer like so:


Repeat until all the cups are covered and you have twelve little skirted cups all standing in a row. Aren’t they cute? They look like they’re ready to dance.

Now for the fun part: GLITTER! Gold glitter is so swanky. I’ve found that the best way to apply glitter to the bottom of the cups is to paint a bit of glue around the tissue-covered rim of the cup and then dip it in a bowl of glitter like you’re adding salt to the rim of a margarita glass.

Make sure the glitter gets all around the edges and then let them sit so the glue can dry. You can press onwards if you like but you’ll be entering sticky-glue-glitter-tissue territory and that can get messy (believe me, I’ve been there). It’s better just to take a break and come back.

When your glitter/glue combo are dry, thread your yarn needle with your ribbon or yarn. You don’t need to tie a knot yet.

Poke your needle through the bottom of your first cup from the inside of the cup. Pull it through until you have about an inch and a half hanging from the bottom of the cup. Tie a knot at the base of the cup. This hanging out piece will be your snakes tongue. You can even cut a fork in if you like.

The next cup is going to be the other side of your snakes head so you want to thread it in such a way that your two cups touch rim to rim.

After you’ve threaded your snake’s head (you can even glue the rims together for extra stability if you like) you’ll thread the rest of the cups so that they stack inside each other like scales on a snake’s body. Don’t pull your ribbon tight though. You want at least an inch of each cup to show. You can adjust the cups as you go but make sure you do so while holding the knotted tongue so that you don’t end up squishing the cups together. Just keep going until you get to the tail!

Tie a knot at the tail’s end, pulling it tight so that it touches the last cup. You can even add a decorative tail here if you like with some gold foil or fancy ribbon if you have it. And don’t forget to glue on your googly eyes!

Now it’s time to add your chopsticks for puppet mobility! We used a hot glue gun to affix the chop stick to the head and then to the fourth scale from the end of the tail but if you don’t feel comfortable with hot glue you can glue it with regular white glue or even use wire. You just want to make sure your chopsticks hold well because this snake is going to wiggle and you don’t want him to fall apart!
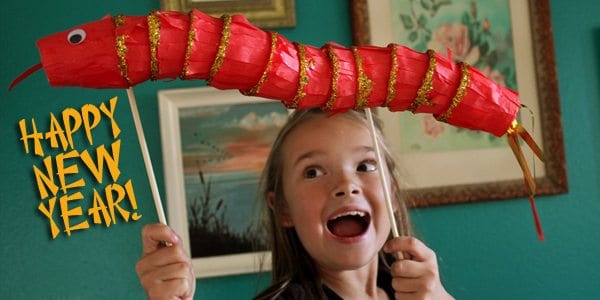
Now put on some music and dance with your snake!


******************
Difficulty Level: Moderately difficult. Glitter, glue and tissue can be messy.
Appropriate Age levels: 6 and up
**Never let a child use a hot glue gun. Hot glue can burn!
More Crafts for Lunar New Year: