Grilled Cheese (Recipes Kids Should Know How To Cook Before Leaving Home)
Grilled cheese. Not only is it a quintessential comfort food it’s also a great go-to meal. I think it’s safe to say that most of us have made grilled cheese on those nights where there is “nothing” in the house to eat. Somehow there is always bread, butter and cheese. Put them together and you have buttery, gooey goodness in just a few minutes of prep time! Given the convenience and accessibility of the grilled cheese sandwich, it’s a great recipe to teach your kids for when they leave home.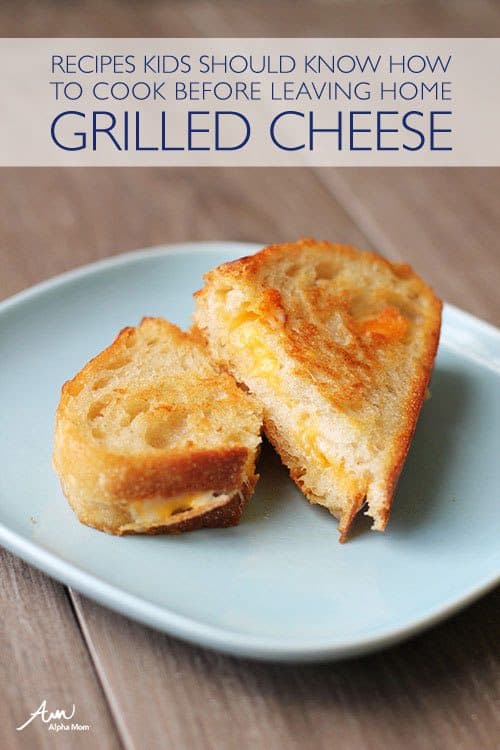
Now that I am working on recipes kids should know how to cook before leaving home with my 11-year-old daughter, Cate, we are constantly thinking about what recipes I should be teaching her to make. Grilled cheese was at the top of our list. It’s a good recipe for new cooks because it allows them to practice their cooking skills without having to follow a complicated recipe. Plus, who doesn’t love a good grilled cheese? Nobody, that’s who! Even Cate’s little sister Anna who hates melted cheese will eat a grilled cheese sandwich!

Cate has made grilled cheese just a few times. After our latest session working on this recipe together, however, I asked Cate if she felt confident that she could make grilled cheese totally on her own. Without hesitation she replied with an enthusiastic, “Yes!”

How to make Grilled Cheese (my recipe)
Ingredients:
- 2 slices bread (you can use pre-sliced bread or buy a loaf of crusty artisan bread, which is our family’s favorite choice!)
- Cheese (Cheddar, American and Monterey Jack are all good choices, but our family’s favorite is Colby Jack, which has a nice cheddar flavor but melts well like Monterey Jack.)
- Butter
Directions:
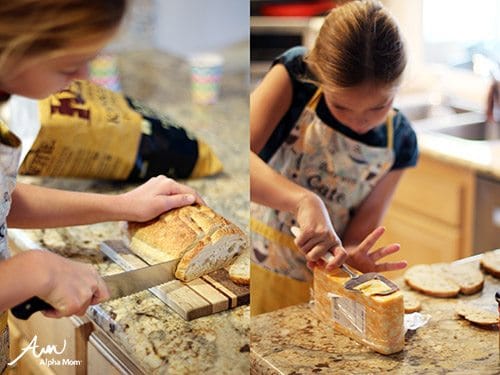
- If the bread you are using is not sliced, with parent’s supervision, use a large bread knife to cut two slices of bread. Hold the loaf firmly with your non-dominant hand on a cutting board (so, if you are right handed, hold the bread with your left hand). Keeping the knife straight up-and-down (perpendicular to the cutting board), “saw” the bread carefully to cut the slices.
- Place a frying pan on the stove and turn the heat to “medium,” which should be halfway on your stove’s knob. If your stove knobs are on a scale of 1 to 10, medium would be 5.
- Place two slices of bread on a cutting board or the counter. Slice cheese and place on one of the slices of bread, making sure to cover the whole surface. If your slices of cheese are very thick (this is often the case if you buy pre-cut cheese), you probably only need one layer of cheese, but if the slices are thinner, put on two or three layers of cheese.
- Place the second slice of bread on top of the cheese to make a sandwich. Butter the top of the sandwich then carefully place it in the hot pan, buttered side down in the pan.
- Once the sandwich is in the pan, butter the other side of the sandwich, which is now the top.
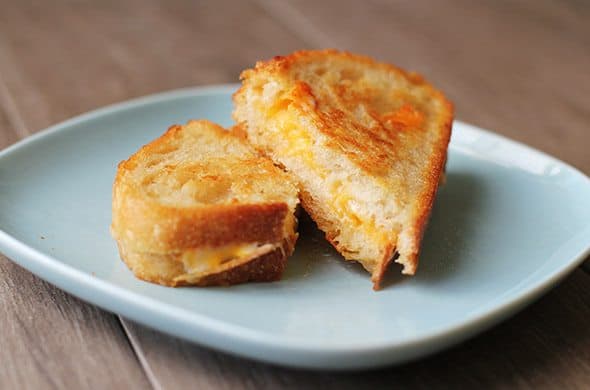
- Let the sandwich cook for about 3-5 minutes. Once the bottom is starting to brown, flip it over with a spatula/pancake turner and let it cook another 3-5 minutes. You can check to see how brown the bottom side is by carefully lifting just one corner of the sandwich with your spatula and peeking underneath, holding it together with the other hand. Once both sides are golden brown (you can flip it back and forth to get it browner if you want), try to pull the slices apart to make sure the cheese is melted. If it’s hard to pull the slices apart or you can see that the cheese is melted completely, then the sandwich is done!
- Transfer the sandwich to a plate with your spatula. BTDT (been there, done that) Tip: Place the “hot” side of the sandwich that was directly on the pan most recently face UP on the plate. By putting the cooler side of the sandwich face down on the plate, you minimize condensation build up on the plate under the sandwich.
Find our other Recipes Kids Should Know How to Cook Before Leaving Home here.