Start the New Year with Your Own DIY Calendar!
*updated with 2022 calendars*
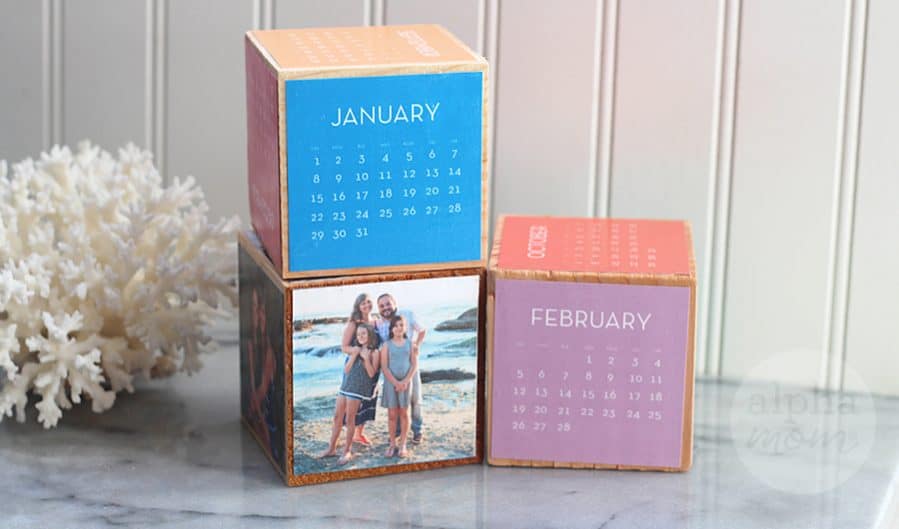
Is your New Year’s resolution to be more crafty? Maybe it should be! Why not start out the new year with a cool picture calendar craft. These wooden calendar blocks are fun to fiddle with and display the date all year long!

Supplies you will need to make this Calendar Craft
- three 3 inch x 3 inch wooden blocks (two cubes for the calendars and one for the pictures)
- our handy Calendar Printable (see link below)
- cardstock
- six 2.75 x 2.75 inch photos
- Modge Podge or white glue
- a big paint brush
- wax paper or tinfoil or a marble-like surface on which to work

How to make this Calendar Craft
Step One:
First, print out our 2022 calendar printable (it’s two pages) here and here. Be sure you print on cardstock. It’s important to use cardstock for this craft and not your normal copy paper because Modge Podge likes to make thin paper ripple. The thinner the paper the more ripples. You still might have some rippling with cardstock but it is significantly less.
Step Two:
Then cut out each calendar page. If you want to create a photo block like we did you will need to find six pictures that are 2.75 inches square. Cut those out, too, so you are all ready to glue them.

Step Three:
Lay down a layer of Modge Podge and center your first calendar page on the wooden block. Then paint a second liberal layer of Modge Podge on top, so that the calendar page adheres to the block on all sides. Smooth out any excess Modge Podge with your paint brush.
Step Four:
Now you can move on to the next page. Alternate months between the two blocks so that no two months in a row are on the same block. You want to do this so that you can stack two months beside each other and see two months at a glance. What direction you apply your calendars on the blocks is up to you but somebody is going to have to be upside down at some point so don’t drive yourself crazy over it.
You can apply calendar pages to all sides except the bottom of the wooden block. Just don’t turn your block over so that a wet side sits on your work surface. You’ll probably want to let those sides dry for a good 4-6 hours before applying the remaining two calendar pages to the bottoms of your blocks because Modge Podge can remain quite sticky for a long time. You might think it’s dry until you go to turn one over and you find it has stuck to your work surface (or another block if you stacked them) and now everything is a ripped-up mess. (Not that I would know anything about that! Heh.)
This is a two-day crafting project
Just have patience and consider this a really easy two-day crafting job. You could cram it all into one day but you’ll risk things not drying completely so I say play it safe and wait overnight.
Once you have all your sides glued and Modge-Podged, and they are dry completely you are ready to arrange and stack! This is the fun part.

There are so many ways to arrange and stack these calendar blocks. Have fun with it. Change it up every month!
And, Happy New Year! We hope this craft keeps you smiling all year long!